Showing posts with label Recipe Post. Show all posts

Friday, August 3, 2012

Let's Talk About Flan

Smooth, creamy, and covered in its own caramel sauce; what's not to love about flan? Flan is a dessert that for a long period of my life I knew I loved it even if I had never tried it. There is something about custard based desserts that sends my senses to the moon and back. The taste of vanilla, the smell of the caramel (which for someone like me, who does not like caramel very much, is saying something). 

No, not that flan. Silly Final Fantasy you do not fight the flan you eat it.
So what is flan? It is essentially a sweet custard that has been baked in a mold, lined with caramel, until it is set. Since pastry school I have come across three types of recipes for flan. All fairly similar but different enough that if you have difficulty with one you are sure to find another recipe that you prefer.

The first is similar to a creme anglaise, it consists of milk, eggs, yolks, sugar and vanilla. This recipe is a bit more difficult than the following two but that is only because it requires you to boil the milk and then temper it in with the eggs. If you do not constantly whisk while adding the hot milk you are going to get scrambled eggs, and while scrambled eggs may be good for breakfast they have no business being in dessert. When I say constantly whisking, I mean constantly whisking. The first time I made a pastry cream on my own I thought I might be able to pour the liquid in, place the pot down then begin whisking. Nope, in those few seconds I had already prepared scrambled eggs. 

The second is a recipe I learned at work. It is similar to the first in that you need to temper the ingredients. However the difference is that instead of milk you used condensed milk and cream. You boil the cream and add it to the condensed milk and egg yolks.A little bit easier but not as easy as the following recipe.

The recipe I used most recently required absolutely no tempering at all. Before we get into the custard we must first make a caramel. This is also fairly easy once you learn what to look for. 

Ingredients:
  • 1 cup sugar
Method:
  1. In a small pot, over medium high heat, place about a 1/3 of the sugar. once the sides begin to liquify move the pot back and forth to distribute the liquid and add a bit more sugar.
  2. Keep doing this until the sugar has melted. Do not leave it settled for too long or it will burn. Another important note about caramel to remember is that it is always darker in the pan than it actually is so it's okay if it looks a bit darker. 
  3. Pour into ramekin or pan of your choosing.
See? How easy was that? You are on your way to making caramel. Now onto the worlds easiest custard recipe.

Ingredients:
  • 6 Eggs
  • 1/2 cup of sugar
  • 2 tsp of vanilla extract 
  • 14 oz condensed milk
  • 24 oz evaporated milk
Method:
  1. Preheat oven to 350 F.
  2. Whisk the eggs, sugar, and vanilla together until smooth. Whisk immediately after adding sugar or you will burn the yolks.
  3. Add each of the milks and whisk until smooth. 
  4. Pour into caramel lined ramekin or pan.
  5. Drop oven to 325 F and bake in a water bath for 35-45 minutes. When it is finished the flan will still jiggle slightly but it should not look watery. 
  6. Once the flan is ready remove from the oven and allow to cool before placing it in the refrigerator for at least 1 hour. 
  7. When you are ready to serve run a knife around the edge of the pan and flip onto an appropriate plate. 
This was made using the first method.
Then that's it! You have delicious flan! The great thing about flan is that it is so easy and delicious, it's a light flavor that is not too heavy on the stomach.  I tried this recipe last night and it was delectable but unfornately I only took a blurry picture of it, and now it is half devoured so taking a new picture is out. So if you are wondering what flan should look like (I guess you could always google it) here is a picture of the flan from my final exam at pastry school.

I recently had a birthday and my wonderful mother-in-law gave me a Le Creuset tart pan. You've seen this cookware before, chances are you know them because they are heavy and they come in a variety of colors. Le Creuset has been in business for nearly 90 years, so they know what they are doing when it comes to cookware. I am so excited to have my first piece and cannot wait to continue adding to my collection. 

From the moment I unwrapped my present and saw the beautiful purple tart pan there my mind was buzzing of what to bake in it first. Naturally I could make a tart as that was the intended use but instead I decided that this marvelous gift would need to make something extra special. It turned out to be the perfect thing for making a large flan and it came out wonderfully. 

Saturday, May 26, 2012

Cheesecake Pie

I have to say Operation Cheesecake Pie was a success.

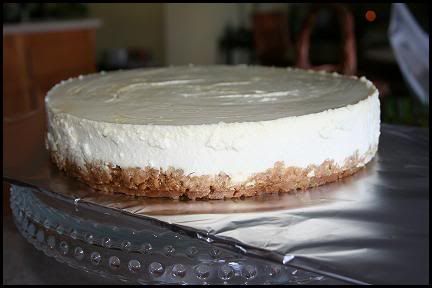
As I mentioned in my last post being in the culinary industry  leaves very little time for much else in your life; that being said I, for the most part, have difficulty finding much time to bake on my days off.  This cheesecake pie is delicious and saves quite a bit of time. I purchased one of those premade graham cracker pie crusts from the market, due to the aluminum tin I don't have to worry about getting my spring form pan out or that pesky water bath associated with cheesecake. Another upside to this cheesecake pie is that it only takes 35 minutes to bake! That is nearly half the time of most cheesecake recipes and like 1/4 of the time of my usual recipe. That's less time baking and less time between me and eating the thing. 

This was the first time I ever baked a cheesecake without sour cream and the first time I used evaporated milk in the recipe. The texture is not quite as smooth and rich as my normal cheesecake recipe but it is still delicious. Additionally, since the recipe is so easy I might have experiment with the flavors.

Ingredients:

  • 2 eggs
  • 1/2 cup sugar
  • 1 tablespoon all-purpose flour
  • 1 package (8 ounces) cream cheese, room temperature
  • 2/3 cup evaporated milk
  • 1 tbsp vanilla extract
  • 1 tablespoon lemon juice
  • 1/2 teaspoon grated lemon peel
  • 9-inch graham cracker crust, baked
Method:

  1. Preheat oven to 325 F.
  2. In a mixing bowl, beat eggs until thick and light yellow. Add 1/2 cup of sugar and the flour, beating until blended.Set aside.
  3. In another bowl, beat cream cheese with a small amount of the evaporated milk until smooth.Do not forget to scrape the bottom! Add remaining milk, the lemon juice, and the grated lemon peel; beat until smooth and well blended. Pour egg mixture into the cream cheese mixture; beat just until blended.
  4. Pour mixture into the graham cracker crust. Bake at 325° for 25 to 30 minutes. Cool on a wire rack.

I didn't top this particular experiment with anything but it's such a light and fresh flavor adding fruit would be delightful. Might have to try adding chocolate to this recipe.

Tuesday, May 10, 2011

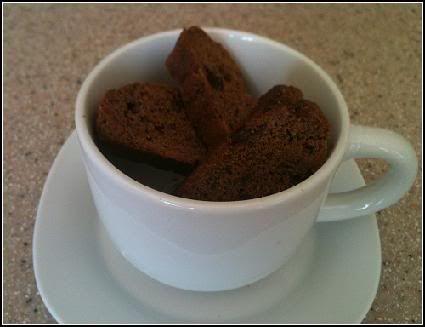
Double Chocolate Biscotti

Biscotti, like macarons, are cookies that I went most of my life under the impression that I did not like it. I don’t know if this is because the only biscotti I’ve ever really seen was at a Starbucks or because most recipes I’ve seen have nuts; whatever the reason it is does not matter now.

In pastry school we made biscotti once and I was not completely frustrated with the process so I decided that I would some today so my mother could have some fresh biscotti waiting for her when she got home.

I myself am a chocolate fiend and since coffee and chocolate are a wonderful pair it seemed only natural that chocolate biscotti would be perfection.

Ingredients

  • ½ stick of butter (soft)
  • 2/3 cups of sugar
  • ¼ cup cocoa powder
  • 2 teaspoons baking powder
  • 2 eggs
  • 1 ¾ cup of AP flour
  • ¾ cup of semi sweet chocolate chips

Method
  1. In a mixing bowl cream the butter and the sugar together until light and fluffy.
  2. Meanwhile, sift the cocoa powder and baking powder. Gradually add to the butter and sugar.
  3. Beat in the eggs one at a time allowing to fully incorporate before adding the next.
  4. Fold in flour gradually by hand. The batter will start to come together and form a single mass.
  5. Fold in the chocolate chips.
  6. Wrap the dough in plastic and allow to chill for 15 minutes.
  7. Preheat the oven to 375 F.
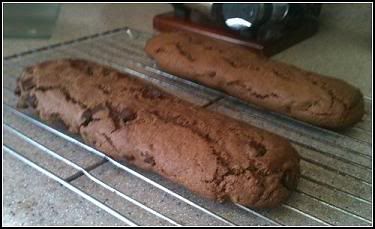
  8. Divide the dough into 2 and roll into 9 inch logs (careful to avoid air pockets). Flatten the top slightly and place on parchment lined cookie sheet.
  9. Bake for 20-25 minutes rotating half way through.
  10. Cool for 5 minutes and then transfer to wire rack to allow to cool for 1 hour.
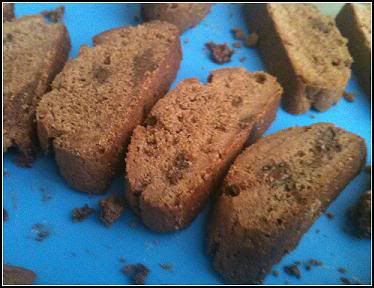
  11.  Cut each loaf into ½ inch slices, and lay flat on a cookie sheet with new parchment. Beware chocolate chips that are on the outside edge though, every time I tried to cut through them my cookie would break and would have to be eaten (oh darn.)
  12. Bake at 325 F for 9 minutes. Flip cookies and bake for another 9 minutes.
  13. Allow to cool and enjoy.

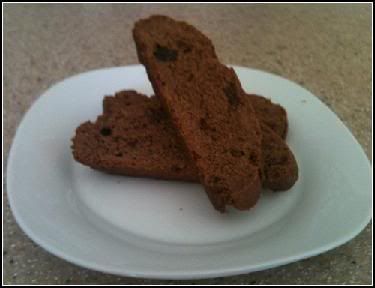
What you are left with it a delicious chocolate cookie that isn’t overpowering or too sweet. They have a great snap and are perfect for dunking.  The only trouble I seem to have with biscotti is cutting them. It seems hitting a soft and gooey chocolate chip causes the piece to crumble. This recipe yielded roughly 2 ½ dozen cookies so I imagine without the causalities it would have made 3 dozen.

The beautiful thing about them also is that they are very quick to come together; the longest part of this recipe is waiting around for them to cool down just to bake them again. I think with the way I’ve been nibbling at them they might disappear pretty fast too.

Sunday, January 23, 2011

Petit Fours

Pastry school is roughly a 40 hour week for me, this leaves very little time for blogging. I had hoped that as I became more comfortable with the schedule this would change but it seems there is always something to do, a fact that doesn't really bother me. I'm in bliss.

Recently we begun our section on petit fours. Petit fours are small cakes and other delectables that can be consumed in one or two bites. Last week after doing a few we were allowed to come up with our own.

The first petit four that my brilliant classmate and I designed was a white chocolate mint mousse on a layer of dark chocolate raspberry ganache and flourless chocolate cake.

The flourless chocolate cake is light, airy and offers a nice contrast to the richly decadent ganache. The mint was light in flavor and didn't overpower the sweetness of the white chocolate mousse. It tasted somewhat like a thin mint with an extra kick of flavor.

The second petit four we concocted was my personal favorite.  We named it a Banana Colada. Since starting the programs I've wanted to use the banana puree we had in the freezer. Seizing the opportunity to use one of my favorite flavors we create a banana mousse on top of a Pineapple Mango Jelly. The bottom layer was a thin layer of banana mousse with chocolate crunch pearls on a layer of coconut dacquoise. Quite delicious and refreshing to eat.

Petit fours really allow the creative juices to flow and due to their small size they are quite difficult to ignore eating. Usually I'm fairly good about not munching on everything we make in class but I find that this section I will eat at least one petit four from each of my classmates.

Friday, July 9, 2010

Lemon Meringue Cupcakes

Family dinner is every Friday, as I think I mentioned in the Baked Shrimp Scampi entry, and dear brother snorlax comes over. With Business School done and over with and me enjoying my summer days I now have a bit of time to do some baking. So for family dinner I made Ina Garten's Lobster Pot Pie (recipe next entry) and for dessert I thought something citrus would be refreshing.

While browsing the internet I stumbled upon another website with just recipes upon recipes for cupcakes, one recipe in particular caught my eye. Lemon Meringue Cupcakes. So fresh, lemony and adorable to boot! If there is one thing that dear brother snorlax loves it's lemon.

Ingredients:

Cupcakes:
  • 1 1/2 cups of cake flour Note: If you do not have cake flour you can mix 1 3/4 cups of AP flour and 1/4 cup of cornstarch to make 2 cups of a AP flour substitute then just use 1 1/2 cups.
  • 1 1/2 tsp of baking powder
  • 1/4 tsp salt
  • 1 stick of butter (room temperature)
  • 1 cup of sugar
  • 2 eggs
  • 1/2 tsp vanilla
  • 1/2 cup of milk
  1. Preheat the oven to 400 degrees F.
  2. Mix Flour, baking powder and salt.
  3. Gradually beat in butter (if it is room temp this will be so much easier), one the butter is well mixed (little clumps will start forming) throughly beat in the sugar.
  4. Beat in Eggs, vanilla and milk and fill into baking cups about 2/3 of the way.
  5. Bake for 20 min. You'll know the cupcakes are done when a tooth pick comes out clean.
Filling:
  • 1 egg + 1 yolk
  • Juice of 1 fresh lemon
  • 1/2 stick of butter
  • 1/2 cup of sugar
I would recommend setting out everything before beginning this process as you want to be beating the mixture constantly so you don't end up with scrambled eggs.
  1. Using a double boiler (that is a bowl set over simmering water) beat the egg and yolk, I used a hand held electric beater.
  2. Beat in the lemon, butter and sugar.
  3. Stir over medium heat until the mixture has a pudding like consistency.
It will look weird at first especially as the butter breaks down but eventually you will end up with something that looks like a lemon pudding. To me this was like making caramel all over again, because you look at the mixture and you tell your self "there is no way that it is going to get thick" and then 5 minutes later it is thick and you wonder how you could have doubted yourself.

Photobucket
Frosting (Meringue)
  • 5 tbsp of water
  • 1/4 tsp cream of tartar
  • 1 1/3 of cup of sugar
  • 2 egg whites
  • 1tbsp of light corn syrup
  • 1 tsp of vanilla
  1. Beat water, cream of tartar, sugar, egg whites, and syrup in a double boiler on low.
  2. When the mixture reaches 140 degrees beat on high for 5 minutes.
  3. Remove from heat , add vanilla and beat for another 3 minutes.

Assembly:

To put the filling in the cupcakes I used a small cookie cutter to hollow out the top of each cupcake:


Spoon a little bit of the lemon filling into each cupcake:
Pop the top back on and cover with meringue!


Friday, May 28, 2010

Blueberry Muffins

Is there anything better than fresh Blueberry muffins right from the oven? During my graduation weekend I could not sleep due to the excitement so I actually got up early and made fresh muffins with organic blueberries for my aunt who was visiting from out of town.

I absolutely love baking for people when they come to visit. It's always nice when you haven't seen someone in years to be able to give them a piece of yourself by baking for them.

As for graduation, I received some lovely graduation presents for my future career as baker :D
Anyways on to the muffins! I used a recipe from Paula Dean and tweaked it a bit.

Ingredients:
  • 2 Cups of flour
  • 2 Tablespoons baking powder
  • 1/2 cup of sugar
  • 1 stick of unsalted butter (melted)
  • 1 egg (slightly beaten)
  • 3/4 cup of whole milk
  • 1 1/2 cup fresh blueberries
  • 1/2 cup granulated brown sugar
  • Splash of lemon juice (optional)
  1. Preheat oven to 350 degrees.
  2. In one bowl, combine the flour, baking powder and sugar.
  3. In a second bowl mix the butter, the egg, and milk.
  4. Pour the wet ingredients into the flour mixture and mix with a spatula until just combined. This is where I typically add a splash of lemon juice, it really brings out the flavor of the blueberries. Be careful to not beat or over mix the batter, it's alright if there are lumps.
  5. Gently fold the blueberries into the batter.


  6. Spoon the batter into a muffin tray filling each cup only about 2/3 of the way.
  7. Bake for 10 minutes, remove from the oven and sprinkle the tops of the muffins with the brown sugar and return the muffins to the oven and bake for an additional 10 to 15 minutes, until the muffins are a beautiful golden brown.

Allow to cool and enjoy!


Saturday, May 22, 2010

Fondant Cakes

Oh Goodness where has the time gone? It has been over a month since I updated and so much has happened since then.

First and foremost, I have been accepted to Culinary School, and I graduated from Business School so I can finally focus on the sweeter and more important things in life.

Secondly, a few very important birthdays went by. My dear brother Snorlax had a birthday and cutie Sami had a birthday. So if nothing else this is a picture post of the cakes I made for their birthdays.


First up, Snorlax cake for my dear brother Snorlax. This was my first time baking in a bowl and I had to keep putting it back in the oven because the middle just would not bake through! I did end up with a nice round tummy for the snorlax though and was pretty happy with the results.


Then for cutie Sami I came up with the idea of trying my hand at a purse cake. More notably, a TokiDoki purse cake. Unfortunately, when I put the cake to let it chill out in the fridge some how the fridge door was left ajar and cake caved in a bit on itself resulting in lumps. So it is a bit of a lumpy purse, she loved it so I decided to chalk this up to experience and not get too upset about it. Especially, considering I made it faster than any other cake and it was also bigger than any other cake I had done before!

There's nothing like cutting out 200 little fondant stars at 1 am :)

Back of the purse:


Front:


Thursday, April 15, 2010

Strawberry Tart


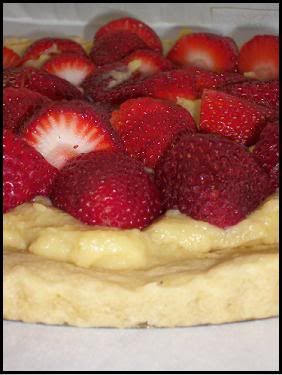
What is it about Business school that keeps getting in the way of my baking? In all seriousness I'm excited about the thought of getting to bake every day. I've been stressed out all week and when I came home I found that we actually have a tart pan. How have I lived here all this time and not known that we had a tart pan is beyond me but I took it as a sign that I needed to bake today. Since strawberries are in season I thought I'd try my hand at a french strawberry tart that Ina Garten showed recently on Barefoot Contessa.

My cream turned more yellow than hers because I accidentally put in too much vanilla extract but after tasting the cream after it chilled I'm not convinced that it was a terrible mistake after all.

Ingredients:
Crust:
  • 1 1/4 Cup Flour
  • 3 tbsp sugar
  • 1/2 tsp salt
  • 3/4 stick of butter
  • 2 tbsp shortening
  • 1/4 cup ice water

It's best if the ingredients are cold it creates a flakier crust.
  1. Combine the flour, sugar and salt in a food processor. Add the butter and shortening, and combine until the dough creates pea sized balls.
  2. Add the water and combine until the dough forms.
  3. Chill.
While that's chilling, work on the cream!


Cream:
  • 1 1/2 Milk
  • 5 egg yolks
  • 3/4 cup of sugar
  • 3 tbsp cornstarch
  • 1 1/2 teaspoons vanilla
  • 1 tablespoon butter
  • 1 tablespoon heavy cream
  1. Set the milk and medium high heat. You don't want to boil it but it needs to be heated up.
  2. Beat egg yolks and sugar until they become light in color and thick. About 3 minutes, then add cornstarch.
  3. Add the scalded milk slowly or you'll end up with scrambled eggs. Actually, the cornstarch helps prevent that but one can never be too careful!
  4. Put the mixture back into the pan over medium heat and stir in the vanilla, butter and cream. Stir until it thickens and then switch to stirring with a whisk. To make sure everything is nice and creamy you can put the mixture through a siv.
  5. Pour into a bowl and place clip wrap directly on top of the cream to prevent a skin from forming and let it chill in the fridge!
Now to go back to the crust. Roll out the crust and place it in the tart pan, and don't be like me and stretch it out because it will, it will shrink. Ina Garten even said "Don't stretch the dough because it'll shrink" and I didn't listen ^^;;. It doesn't shrink dramatically but you end up with something the resembles a pizza instead of a tart.

Bake the crust at 375 degrees for 10 minutes with a butter piece of foil on top of it covered with beans to make sure the crust does not puff up. After 10 minutes take off the foil with the beans and place the crust back in the oven for another 15-20 minutes.

Once the crust is out of the oven and cooled spoon the cream into the crust and then cover in lovely strawberries.


Saturday, March 13, 2010

Baked Shrimp Scampi

So when I started this blog I figured for the most part it would be filled with sweets but recently I was watching Barefoot Contessa and Ina Garten (my hero!) had a fantastic recipe for Baked Shrimp Scampi so I just had to try my hand at something baked and savory.


Ingredients:

  • 2 lbs Large raw shrimp

  • 3 Tablespoons Olive Oil

  • 2 Teaspoons salt

  • 1 Teaspoon pepper

  • 1 1/2 sticks of butter-Room Temp

  • A dash of Garlic powder

  • 1 Shallot Diced

  • 3 Tbsp parsley

  • 1 teaspoon lemon zest

  • 2 Tbsp lemon juice

  • 1 Egg yolk

  • 2/3 cup panko or bread crumbs


Recipe:

  1. Peel, de-vein, and butterfly the shrimp so they stick they're little tail in the air.

  2. Place the shrimp, Olive oil, salt and pepper in a bowl. Toss together and allow to sit while you prepare the topping.

  3. Combine the butter, garlic (I use a dash but you can used how ever much you like if you're a big fan of garlic), shallot, parsley, lemon juice, lemon zest, yolk and mash it together. This is another instance where your best tool is a pair of clean hands.

  4. Mix in the panko crumbs.

  5. Arrange the shrimp in a glass or gratin dish so they're little tails are up in the air. Since you've butterfly'd them they'll be half the thickness they'll cook quickly.

  6. Cover with the panko crumb mixture.

  7. Bake at 425 degrees for 10 minutes.

  8. Squeeze some lemon juice on top of scampi as soon as it comes out of the oven and enjoy!


Thursday, March 11, 2010

Chocolate Chip Cookie Dough Cheesecake Bars

Man Business school is such the time suck, but I cannot believe that I'm already half way through my last semester and just that much closer to culinary school...hopefully.

Unfortunately, this meant not too much baking was happening but then I was directed towards a recipe. A recope that makes you gain 5 pounds just from looking at the images.

Chocolate Chip Cookie Dough+Cheesecake bars=Love...and fat

These bars accomplish what I hope every baked good to accomplish. The eye close. That magical reaction to something that taste so good you have to close your eyes to just take in everything. I am please to note that everyone that I presented these beauties to did the same thing. Everyone did the eye close and to me that's amazing, but enough about how much people enjoyed these let's get onto the pictures and recipe!
Photobucket

Ingredients:
Crust:
  • 1 1/2 Cups graham cracker crumbs

  • 5 Tablespoons of melted butter


Cookie Dough:
  • 5 Tablespoons of butter (room temp)

  • 1/3 cup brown sugar

  • 1/4 teaspoon salt

  • 1 teaspoon Vanilla extract

  • 3/4 Cup flour

  • 1 Cup of chocolate chips


Cheesecake:
  • 10 oz. creamcheese

  • 1/4 cup sugar

  • 1 Large egg

  • 1 teaspoon vanilla extract


Recipe:
  1. Preheat the oven to 325 degress

  2. Butter a 9x9 pan and line it with parchment paper (the butter keep the parchment paper in place) & leave enough to extend over the side.

  3. Combine the crumbs and butter until moistened

  4. Press the mixture into the bottom of the pan and up the sides.

  5. Bake for 6 minutes and allow to cool while you're making the next two parts.

For the cookie dough
  1. Mix butter, brown sugar, salt, and vanilla extract at medium speed until smooth

  2. Drop to slow and add flour

  3. Stir in the chips

  4. Set aside...and maybe take a nibble for yourself.


For the Cheesecake
  1. Beat cream cheese and sugar until smooth.

  2. Add egg and vanilla, beat until blended

  3. Pour into that lovely crust!

  4. Drop some cookie dough over the filling

  5. Bake for 30 min.

  6. Cool for 1 hour


That hour takes forever but I promise if you stick out you will be well rewarded, and what amazing is that since the cookie dough doesn't have any egg in it, it still deliciously doughy.
Photobucket

Monday, February 22, 2010

Quadruple Chocolate Cake Truffles

Wow, it has been a while. One of the biggest chocolate consumption holidays passed so for Valentine's Day I made the boyfriend something rather special. On Valentine's Day the first year the boyfriend went to college I made him a basket of goodies, including a jar of truffles. The truffles seemed to be a hit with him (and part of his dorm) so I've been looking for ideas to shake things up a big with truffles.

First and foremost bake a cake. Any cake you desire really. For this project I used Double Chocolate cake (chocolate cake with chocolate chips in it; be sure to toss the chips in some flour first so they don't all sink to the bottom). Once your cake is out of the oven and has cooled the fun can begin. Go against all your baking instincts and toss the cake into a bowl.


It feels wrong at first but you must remind yourself that the end result is worth it, so go a head and just tear that cake up.

Next you'll want to add about 3/4ths a can of your favorite frosting. You can of course make your own frosting and should you decide to you'll need about 12 oz. For this project I used Dark Chocolate frosting.


I used a cookie scoop to form the balls but you'll want to use your hands to form them and made them into round balls. Stick them in the fridge while you make the ganache.

I used Ganache for the coating on these truffles because the way the chocolate melts in your mouth is absolute heaven. It gives the truffles a beautiful coat but stays somewhat soft so once you pop those puppies in your mouth the chocolate has already begun to melt and you're getting that intense chocolate flavor.

You'll want to place the truffle in the ganache and roll it around a little bit. Place it on a fork and move the fork back a forth while spooning on more ganache to get a smoother coat.

I can't believe I didn't take a better picture of these before I gave them to the boyfriend. He ended up inhaling them, then on Valentine's day when I made him dinner (what? I can't make sweets all the time can I?) we put some of the last truffles on top of the ice cream we had for dessert.


Luckily for Valentine's Day the boyfriend bought me a mini photoshoot area so hopefully I can start taking better pictures of my stuff. You know, if he doesn't inhale them first.

Monday, February 8, 2010

Chocolate Caramel Puff

My earliest memory where I knew I loved chocolate was watching Death by Chocolate with Marcel Desaulnier with my mother. So imagine my surprise when I found out we had a cookie cookbook by Marcel for 20 years without me knowing it!

I ended up reading the whole cookbook in one night (am I the only one that reads cookbooks like regular books?)

Ingredients for the Chocolate Pate Au Choux (puff dough):
  • 1/2 cup all-purpose flour
  • 2 tablespoons unsweetened cocoa powder
  • 1/2 cup of water
  • 4 tablespoons unsalted butter
  • 1 tablespoon granulated sugar
  • 3 large eggs
  1. Preheat the oven to 375 degrees.
  2. Sift flour and Cocoa powder together then set aside.
  3. Heat the water, butter, and Sugar. Once the mixture is hot stir with a wooden spoon to dissolve the sugar and bring to a boil.
  4. Remove from the heat and add the dry ingredients.
  5. Stir with the Wooden Spoon to stir until the mixture comes together.
  6. Once the mixture has come together add each egg one at a time after each on is incorporated.
  7. Divide the dough into 24 portions and bake for 20 min.-when baking half way through the time switch and rotate your pans.


While those bake it's time to work on the Caramel Chocolate Ganache!

Ingredients:
  • 8 ounces semisweet chocolate (chopped)
  • 4 ounces of unsweetened chocolate (chopped)
  • 1 1/2 cups heavy cream
  • 2 tablespoons unsalted butter
  • 1/2 cup granulated sugar
  • 1/8 teaspoon fresh lemon juice
  • Splash of coffee
  1. Place the chopped chocolate in a bowl and set aside.
  2. Heat the heavy cream and and butter over medium heat. You want to melt the butter and then allow the cream to simmer.
  3. In a separate, saucepan combine the sugar and the lemon juice. Stir with a whisk to combine and caramelize for 7 to 8 minutes. This was especially exciting for me because I have never made caramel before, and at the 6 minute mark I was standing there thinking there's no way this is going to turn into caramel but lo and behold:

  4. Pour 1/2 the hot cream into the sugar and stir with whisk until it stops bubbling. Then pour the rest and stir until smooth.
  5. Pour over the chocolate and allow to sit for 5 minutes before stirring with whisk to stir. Here is where I add a splash of coffee because it really brings out the flavor of chocolate.
  6. Allow to sit until the ganache gets thick.
  7. Now that your puffs are out of the oven and your ganache is thick it's time to slice the puffs horizontally.
  8. Pipe the ganache on the bottom half of a puff and top with the other half and then prepare yourself for heaven in your mouth.


I made these especially for my sweetie as an early valentines day sweet, and I was really happy with the outcome. These are perfect for the chocoholic in your life (or for yourself if you have a chocolate addiction like me.)

Tuesday, February 2, 2010

Cake Brownies

My mother brought home a brand new cook book which led to me making brownies.

Ingredients:
  • 1 1/4 up sugar
  • 3/4 cup butter
  • 1/2 cup unsweetened cocoa powder
  • 2 eggs
  • 1 teaspoon vanilla
  • 1 1/2 cups all-purpose flour
  • 1 teaspoon baking powder
  • 1/4 teaspoon baking soda
  • 1 cup milk
  • Splash of coffee
  • Fudge Frosting (recipe below)
  1. Preheat oven to 350 degrees, and grease a 15 x 10 x 1 pan.
  2. In a pan heat sugar, butter, and cocoa powder. Stir and combine until the butter is melted. Then remove from heat. Add Eggs and vanilla, with a wooden spoon combine. -Should you want to add the splash of coffee now would be the time. Coffee really brings out the chocolate flavor of the sauce.
  3. In a separate bowl combine flour, baking powder and baking soda.
  4. Add flour mixture and milk alternately to the chocolate mixture, beating and combining each time. The mixture is going to be a bit thinner than normal brownie mix.
  5. Bake for 20 minutes!When they come out they'll be nice and gooey and light. Like a cake but more dense.

  6. Let cool for 2 hours (I know It sounds long but good things come to those that wait). Spread the chocolate fudge frosting on top. Cut and enjoy!

Ingredients for Frosting:
  • 4 3/4 cups of sifted confectioners sugar
  • 1/2 cup cocoa powder
  • 1/2 cup of butter
  • 1/3 cup of boiling water
  • 1 teaspoon of vanilla
  1. Combined powdered sugar and cocoa powder. Add butter, boiling water, and vanilla. Beat with an electric beater on low speed till combined. Beat for 1 minute on medium speed. Cool for 20 to 30 minutes or till the frosting looks spreadable.
  2. Put on top of cake brownies and enjoy.
These brownies are light and chewier than Brownies but more dense than cake, either way they're absolutely addicting.
Sunday, January 31, 2010

Green Tea Cookies

Ok so pixie is back and baking! Jeez, business school starts up and suddenly I cannot find a minute to bake.

So one flavor I have always loved is green tea. Green tea ice cream is my absolute favorite and then a friend of mine mentioned green tea cookies! I had thought about green tea cookies before but had never really found a recipe. Well thanks to Appetite for China. I found one!

Ingredients:
  • 1 cup all purpose flour
  • 1/4 cup sugar
  • 1/4 cup confectioners' sugar
  • 1 tablespoon green tea matcha powder
  • 1/4 teaspoon salt
  • 1/2 teaspoon vanilla
  • 1 teaspoon water
  • 1/2 cup unsalted butter, chopped into small cubes
  1. Mix the flour, sugars, green tea powder, and salt in a large bowl.
  2. Add the vanilla, water and butter.
  3. Mix them together until a dough forms. The dough will look a bit weird:
  4. Just get in there with your hands and keep mixing until the dough fully forms!
  5. Roll the dough into a log onto a piece of wax or parchment paper. Wrap the paper around and shape the log until it is smooth.
  6. Chill for 30 minutes.
  7. After chilling slice the log in to cookie slices and bake for 10-12 minutes at 375 degrees.

  8. Let cool for 5 minutes and enjoy!

The taste is definitely a green tea flavor, this will surely delight those who truely love green tea. However the taste can also be...interesting. Might have to tweak the recipe, perhaps add honey to make them sweeter, to make it delicious for non-green tea fiends.

Saturday, January 16, 2010

Oblivion Chocolate Truffle Torte


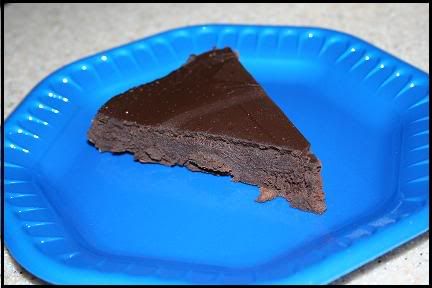
Oh Chocolate. Oblivion Chocolate Truffle Torte is the wrong name for this torte, it should probably be called punch in the mouth chocolate torte. This torte is for the chocolate lover, you really taste chocolate once it begins to melt in your mouth, with this torte you skip the step of letting it melt and are hit with intense flavor.

Ingredients:
  • 16 ounces of semi-sweet chocolate (bitter sweet will work too if you want dark chocolate)
  • 1 cup (2 sticks) unsalted butter
  • 6 large eggs

  1. In a double boiler (glass bowl set over boiling water) combine the chocolate and butter. It's really important that the bottom of the bowl doesn't touch the water or else the chocolate is more likely to burn. Burnt chocolate makes for a sad day.
  2. While the chocolate is melting in another double boiled (in this case the water should just be simmer) beat the eggs until warm to the touch. It is important that you are constantly stirring or else the eggs will curdle.
  3. Remove from the heat and beat until triple in volume and soft peaks form when the beater is raised (about 5 minutes)
  4. Using the a large wire whisk fold 1/3 of the eggs into the chocolate (always eggs into chocolate never other way around) until there are no streaks. Continue with the rest until there are no streaks.
  5. Pour into a prepared spring form pan and place in a water bath.
  6. Bake at 425 degrees for five minutes, then loosely cover with a buttered foil and bake for 10 minutes.
  7. Let cool for 45 minutes on a rack and then cover with plastic and refrigerate until very firm for about 3 hours.
Before serving allow to come back to room temperature and enjoy, if served chilled the texture is like a dense fudge so either way it's delicious.


Friday, January 8, 2010

Lemon Cheesecake


It is the week of cheesecakes for me!

Every Friday night I have family dinner with my mom, her husband John, and my dear brother Snorlax (and our wonderful kitten Louis of course, who supervises my baking). This week I've decided to make Lemon Cheesecake for dear brother Snorlax.

Following the same recipe forNew York Cheesecake that I made for my dad this past week. I added a lemon curd to the top.

For the Lemon Curd:

Ingredients:
  • 1/2 Lemon grated zest
  • 1/3 cup of lemon juice
  • 5 tablespoons of sugar
  • 1 large egg
  • 1/2 teaspoon vanilla extract
  1. Combine lemon zest, lemon juice, and sugar in a sauce and bring to a simmer.
  2. In a separate bowl, beat the egg until light.
  3. Beat some of the hot lemon mixture into the eggs. -It is really important to do this slowly and to constantly beat the egg or else the egg will cook because of the heat and you'll have scrambled eggs. Which is not yummy in cheesecake.
  4. Add the egg mixture back into the saucepan and strain.
  5. Stir in the vanilla and cool to room temperature.

You would add this to the top of the normal cheesecake (therefore making it not a new york style). Adding this to cheesecake I made the mistake of stirring it too much, the egg in the curd caused air bubbles which led to my first cheesecake cracking. Disappointing but still delicious, and in the end when it is for loved ones as long as it's delicious the way it looks doesn't really matter.


It still looks pretty yummy.

Thursday, January 7, 2010

New York Style Cheesecake

Oh Cheesecake. I don't know what it is about this dessert that makes it a complete and total mystery but it's a recipe that usually has me doing more research than any other recipe. Honestly, the variations on this recipe I've seen is mind boggling. Anyways, let's get on with it.

My father's side of the family is from New York and so he is very particular about his cheesecake. As far as I can tell what makes New York Cheesecake New York Cheesecake is the cream cheese to sour cream ratio. Also (according to my father and other new yorkers) it cannot have any sort of topping. Once you put topping on it it is no longer considered New York Cheesecake.

I finally found a recipe that I like and that really seems to come out perfectly everytime I use it. It is from The Cake Bible by Rose Levy Beranbaum, the boyfriend's mother gave it to me and it is by far one of my favorite cook books. What I really love about it is that Rose uses some scientific explanations and I can also read through the book the way you would any other.

For the Graham Cracker crust I used a different recipe as Beranbuam suggests just pressing graham cracker crumbs into the cake afterwards and quite frankly I'm not that talented.

So then for the crust:

Ingredients:
  • 1 1/2 cups of graham cracker crumbs (about 9 cookies in total)
  • 4 tablespoons melted butter
  • 2 tablespoons granulated sugar
  1. Stir together in a small bowl. Really make sure that all of it is incorporated and there are no dry pockets.
  2. Press into the bottom of a springform and up the sides. I have found that it is really easy if you start from the middle and work your way out allowing the crust to push itself up the sides.
You'll get a lovely crust to put off to the side until your batter is ready.


Okay now onto the batter. Cheesecake is another one of those recipes that Os really can't handle but I've been having fun using Alton for this little project.

Ingredients:
  • 16 ounces of cream cheese (2 packages)
  • 1 cup of sugar
  • 3 large eggs
  • 2 tablespoons of freshly squeezed lemon juice
  • 1 1/2 teaspoons vanilla extract
  • 1/4 teaspoon salt
  • 3 cups sour cream
  1. Beat cream cheese and sugar until creamy and smooth (about 3 minutes).
  2. Beat in eggs one at a time, the best results come from waiting until each egg is thoroughly incorporated before adding the next. Also, remember to scrape down the edges.
  3. Add the Lemon juice, vanilla, and salt and beat until incorporated.
  4. Beat in the sour cream just until blended. -as an aside I find that adding the sour cream 1 cup at a time until thoroughly incorporated works well.
  5. Pour batter into your prepared pan. Wrap the pan in 3 layers of tin foil to prevent water from seeping in. Place the pan in a water bath (put about an inch of water in another pan and then place the cheesecake in the center)
  6. Bake for 45 minutes. After 45 minutes turn off the heat and do not open the oven door. Let the cheesecake cool for one hour in the oven then take out and let cool for one hour. Cover with plastic wrap and let refrigerate overnight.
As a side note do not do not do not open the oven door while the cheesecake is baking. Cheesecake is so fussy that opening the over door can lead to cracks.


Ta da! Cheesecake!

Saturday, January 2, 2010

Chocolate Dipped Peanut Butter Cookies

I am thoroughly convinced that there is no better taste combination than chocolate and peanut butter. So when my friend sami's grandmother asked me to make her 5 dozen cookies for her cookie exchange--and mentioned that chocolate chip was not an option but the cookies should be rather simple--I knew chocolate dipped peanut butter cookies were the answer.

Simple, delicious, and who doesn't love melting chocolate? And peanut butter cookies have to be the easiest cookies in the world. Unfortunately they are terribly difficult for Os--thick things like peanut butter...or butter for that matter make him turn into a grump old man.

I use a simple peanut butter cookie recipe:

Ingredients:
  • 1 cup peanut butter
  • 1 cup of sugar
  • 1 large egg
  • 12 oz for semisweet chocolate morsels
  1. Preheat the oven to 350 degrees.
  2. Beat the Egg, peanut butter, and sugar until a dough forms.
  3. Form the dough into small balls and place on cookie sheet.
  4. Bake for 10 minutes.
  5. You can easily create a double boiler by simmering water in a pot and placing a glass bowl on top of it. Place your chocolate chips in the glass bowl and stir them around with a rubber spatula. Once the chocolate is halfway melted you can remove it from the heat and just continue to stir so the chocolate won't burn.
Once the cookies have cooled just dip them in the chocolate and let them sit in the fridge until you're ready to eat them.


The best thing about these cookies is how the chocolate melts in your mouth and then the soft center of the peanut butter cookie is just perfection.

That's why I love Sami. She is one of those people that no matter what sweet I make she'll eat it even if it's ridiculously simple like peanut butter cookies; however perhaps when it comes to cookies simple is always best.

I honestly cannot for the life of me remember why I used to think peanut butter cookies were so difficult. It might be because Os doesn't do well with them. Sometimes I'd rather use the Betty Crocker easy cookie mixes for peanut butter cookies, which I'm sure is some sort of baking sin, but it's a lot better than dealing with Os when he's being fussy.

Friday, January 1, 2010

Lemon Bars

I have to admit that 99.99% of my baking is usually for someone else. One of my favorite people to bake for is my brother Snorlax. My brother used to be a sane Chocoholic like myself but in recent years it seems that his love for chocolate has waned. As it turns out his sweet tooth is delighted by tart! Lemon, lemon, lemon!

So after raiding my mother's cookbook shelf I came upon Luscious Lemon Desserts, a collection of tartly delicious lemon recipes.

Ingredients:
  • 1 Cup plus 2 tablespoons All-purpose flour
  • 1 3/4 cups confectioners' sugar
  • 2 tablespoons finely grated lemon zest
  • Pinch of salt
  • 1/2 cup chilled unsalted butter
  • 1/2 teaspoon baking powder
  • 3 large eggs
  • 1/4 cup plus 3 tablespoons fresh lemon juice
  1. Preheat oven to 350 degrees. Butter an 8x8 baking pan
  2. Whisk 1 cup of the flour, 1/4 cup of the confectioners' sugar, the zest, and the salt.
  3. Cut the the butter into tiny cubes. The cookbook calls for a pastry blender or 2 knives used in scissors-fashion, but I cut the butter into tiny tiny pieces and it made no difference.
  4. Mix with your best tool-a pair of clean hands!-until the mixture resembles coarse crumbs and then keep kneading the mixture until the dough comes together.
  5. Transfer the dough to the baking pan and press it evenly into the bottom. Bake for 25 minutes and allow it to cool while you make the filling
  6. Whisk together the remaining confectioners' sugar (1 1/2 cups), the remaining flour (2 tablespoons) and the baking powder in a small bowl.
  7. Beat the eggs on high for about 2 minutes. Reduce the speed to low, add the sugar mixture, and beat just until blended, scraping down the side bowl.
  8. Add the lemon juice and keep blending!
  9. Pour the lemon mixture over the crust and bake for 18-20 minutes.
  10. Let cool in the pan.
Cut and enjoy after they've cooled. Just before serving sprinkle with more confectioners' sugar.

A sure delight for anyone that likes lemon. I had a bite and could not believe the tartness. I feared that they might have been too tart but my brother loved them. I think next time I want to use the same recipe but instead of using a square baking pan I want to use tartlet pans. How amazing would mini lemon tarts be?

Thursday, December 31, 2009

Yule Log with Kahlua Cream and Chocolate Ganache

Every year I can never think of what to get my boyfriend's father for Christmas and so every year I end up making something to delight the sweet tooth. This year my boyfriend mentioned that his father enjoys those hostess snack cakes, Ho Hos, so I decided to try my hand at making a Yule Log. I had seen pictures and while I had never anything rolled before I thought he might enjoy it.

Fortunately, my darling friend Tabitha and her husband Adam bought me The Golden Book of Chocolate as an early Christmas present and I was able to find a recipe.

Ingredients:
  • 1/2 cup all-purpose flour
  • 1/3 cup + 2 tablespoons unsweetened cocoa powder
  • 1/2 teaspoon baking powder
  • 5 large eggs, separated
  • 3/4 cup granulate sugar
  • 2 tablespoons melted butter
  • 1 Teaspoon vanilla extract
  • 1/2 teaspoon
  • Splash of cold coffee (optional)
  1. Preheat the oven to 400 degrees.
  2. Butter and Flour a jelly roll pan (17 x 12 1/2 inch) and line it with parchment paper. Silly me I had always used these pans as cookie sheets--still do--but I had never known that they were actually considered Jelly Roll pans. For a moment there I thought I was going to need to purchase a brand new pan! Not that that would have really upset me ;)
  3. Mix the flour, the baking flour and the 1/3 cup of cocoa powder in a large bowl.
  4. In a separate bowl beat the eggs yolks, 1/4 cup of sugar and the melted butter at a high speed until pale and thick. -As a side note, if you are not confident in your egg separating skills I suggest watching Episode 94 of Three's Company Jack shows the girls how to separate eggs and the lesson actually helped me get more confident in it too.
  5. Add the vanilla extract and if you choose to add a splash of cold coffee you should do it now. The recipe in the cook book did not call for it but I find most of the time I make anything with chocolate I end up adding a splash of coffee. Ina Garten does this often and I have found that it really does bring out the taste of the chocolate instead of over powering it.
  6. Use a rubber spatula to fold in the dry ingredients.
  7. In yet another bowl, beat the egg whites and salt in at a medium speed until frothy. With the mixer at a high speed, gradually add the remaining cup of sugar (1/2 cup) until stiff peaks form. Fold this into the batter.
  8. Spoon this into the prepared pan and bake for 10-12 minutes.
Next is the fun part. When the cake comes out you'll want to flip it over onto a kitchen towel that has been dusted with the remaining amount of cocoa powder (2 tablespoons should be enough but don't be afraid to use more). My mother and I had such an adventure with this because you need to flip the cake onto the towel once it comes out of the oven. After a few moments of us hopelessly trying to figure out how to flip it struck me that the most obvious way is the best way. Finally, I simply yelled out "No fear!" grabbing the edges of the parchment paper I pulled and flipped the cake onto the towel. We had a good laugh because my mother was on the side of the cake and was now covered in cocoa powder.


Using the cloth roll the cake up and let it cool this way.


This will give you time to make the cream.
Ingredients:
  • 5 Large eggs yolks
  • 2/3 cup granulated sugar
  • 2 tablespoons Kahlua (or your favorite coffee liqueur)
  • 2 cups milk
  • 1/4 teaspoon salt
  • 1/2 teaspoon vanilla extract
  1. Beat the yolks, sugar, and liqueur until pale and thick.
  2. Bring the milk to a boil.
  3. Place the flour and salt in a bowl.
  4. Pour a bit of the boiling milk and stir until smooth. Once smooth pour the remaining milk.
  5. Pour the milk, flour and salt mixture into the yolks and sugar. -You must must must do this part slowly and be sure to stir while doing this. You want to bring the temperature of the eggs up slowly or else you'll end up with scrambled eggs and those do not go well with chocolate cake.
  6. Simmer over low heat, stirring constantly until it gets thick.
  7. Let it cool.
Once your cream is cool you'll want to unroll your cake and spread the cream onto the cake.

Then reroll the cake!

I sliced off the edges for neatness sake:

Then to give the cake that snack cake look I decided to cover it in chocolate Ganache.

Ingredients:
  • 12 oz semi-sweet chocolate, grated chopped or morsels will work.
  • 1 1/4 cups heavy cream
Simply bring the cream to a boil and pour the hot cream into the chocolate and stir until the chocolate has completely melted and the mixture is shiney. Let cool and then pour over the cake.
 
Blog Template by Delicious Design Studio