Friday, May 31, 2013

Flavor rut

Occasionally I will look at the desserts I've been making a realize that I'm in a flavor rut. Not that the flavors aren't delicious but I find myself getting bored of constantly doing lemon, coconut, coffee, raspberry, and yes even chocolate. I feel guilty saying that chocolate is that long term relationship that you know you love and you'll always go back to but after so much time you want something a little more exciting. That feels so wrong since chocolate is amazing. Everyone knows chocolate is fantastic, frankly I think even chocolate knows its fantastic. It compliments almost any flavor; but alas, here I am in a flavor rut.

Usually when I get like this I just try to get some new flavor. Something I haven't done in a while or maye a texture I've never tried. This time I asked my boss to get some acai berry purée for me. 


You've heard of acai but if you've never tried it you're missing out. The flavor is pretty subtle the purée tastes a bit like tea, somewhat sweet but nothing overpowering. Since I wasn't sure of the taste at first I decided to make it into a jelly. I won't lie I love making jellies, if I ever have a fruit and I'm unsure what to do with it, I'll make a jelly. After trying out the Acai berry jelly and realizing what a subtle taste it was I decided to pair them with something tart and not overly sweet. Raspberry!


Sophia suggested that I make a mousse out of the organic raspberries we had in the cooler. So we made a Raspberry Mousse Bombe with Acai berry Jelly. It's a bit tart, it's a bit sweet and it's all around yummy. You try something it might not always work and perhaps next week I'll be able to try something a bit more daring with the acai puree that I have but when it comes to experimenting with flavors I suppose there is nothing wrong with the research.

Wednesday, May 29, 2013

Tiramisu revisited

So a few posts ago I mentioned that I wanted to try making a bombe version of tiramisu. Well that's exactly what I did at work today. I made a milk chocolate mousse infused with coffee extract, folded in some mascarpone cheese and lightened it up with some whipped cream. There is a bit of lady fingers inside to give it a bit of a crunch and break up all that mousse and chocolate sponge. 

For the first time I didn't soak it in alcohol. I couldn't tell you why tonight I just wasn't feeling the rum or wine. Usually alcohol is one of the background flavors (I think that's a post for another time) but I was pretty content with the way this came out. Again it was a somewhat collaberation with my coworker Sophia. It's funny because is her off day but that doesn't stop my from texting her "what do you think? Milk or dark chocolate?" "How does this look? Is that enough cocoa powder?" Sorry Sophia you know I need your expert opinion. 

Best part about trying something different? Always have to try it! What you want might not always work but I do love the research. 

Mint chocolate

Recently my chef has allowed us to have a bit more freedom when it comes to the desserts for the restaurant. Well he always allowed us a great deal of creative freedom but recently he said "we need different shapes!"  Naturally Sophia & I jumped at the chance to try something different. Our first differently shaped dessert is called the minty rosa. 
We named it after our coworker rosa because she loves chocolate mint. It's actually based on a petit four that I made in pastry school I just made it bigger and better for a dessert. So this dessert is a white chocolate mint mousse with a dark chocolate ganache and a fresh raspberry jelly center. Sophia helped me take it to the next level though. When making the raspberry jelly I usually just use the raspberry purée that we have in the reach-in cooler, but this week we had some beautiful organic raspberries so she puréed and strained them for me. 
Honestly I think the fresh organic raspberries made all the difference. Even our executive chef tasted and loved it. Who knows what we'll come up with next but I cannot wait to eat it. 

Monday, May 27, 2013

Tiramisu: Coffee perfection

Oh tiramisu. Where I work we can hardly keep tiramisu inspired desserts in stock. As soon as that first cocoa powder covered dessert is in the display case people are asking, "is that tiramisu?" "Can I have another slice?" "What do you mean you're out of tiramisu?" "When will you have more?"

Tiramisu is an Italian dessert that consists of lady fingers, mascarpone cheese and Marsala wine(or maybe a delicious dark rum instead). When reading up on the dessert (everyone does that right?) I learned that tiramisu roughly translates to  pick me up. Tiramisu is a dessert that is telling you to pick it up and shove it in your face. Okay maybe it's more polite than that.  
 When I adapt the flavor for the restaurant I don't use lady fingers but I do soak the yellow sponge cake with coffee and alcohol. The frosting has a light coffee flavor and it then sprinkled with cocoa powder. Truthfully the mascarpone, to me anyways, doesn't add much flavor. My coworker tells me that I really don't have to add it as no one would notice with the coffee and wine overpowering the light flavor of the cheese, but I suppose I'm slightly traditional when it comes to flavors like this. 

So tiramisu has everything anyone could want. It's a combination of cheese, chocolate, coffee and wine. Perhaps I could adapt it into bombe form, a tiramisu mousse with lady fingers in the center. I might have to try that tomorrow. 

Today is Memorial Day so I'm sure the restaurant will run out of the nine tiramisu cakes I made last night. 

Saturday, April 27, 2013

Cakes, cakes, cakes

Pina Colada Cake
Before I went to pastry school I made cakes at home. I made cakes the way I imagine most do, boxed cake mix, can of frosting or two (one for me and one for the cake). I have really fond memories of helping my mother make cakes for her office parties when I was younger. It was always my job to make sure there was no extra batter left in the bowl before washing it.

By the time I got to pastry school I had this silly notion that I was pretty good at building and decorating cakes. I thought to myself ," This part will be easy." How wrong I was. When you're at home you might not think anything of spending a half hour on a cake. When I was in school my chef informed our class that this would not do. In his way he told us that if we spent more than 30 minutes on a basic cake that any employer would more than likely thank us for our time. He did that frequently. If you can't write in chocolate no one will hire you, if you can't clean as you go no one will hire you, if you can't build a cake in less than 30 minutes no one will hire you. I'm not entirely sure that's really true but I know that it pushed me to work faster, cleaner and all around more inefficiently. 


When I was in school I admit it I couldn't build a cake in less than 30 minutes. In case you're unsure about what I mean by build a cake that includes: trimming, cutting, syruping, filling, frosting, and decorating. In fact it wasn't even until I started at my first job that I really started getting better at it. That might have something to do with amount of cakes that I had to decorate; once you have to make more than 20 cakes in a day you start to develop a rhythm. The older ladies at work (who have been doing this for longer than I've been breathing) showed me their tips and tricks, a fact that I'm extremely grateful for.

My average time is down to roughly 7 minutes per cake, perhaps a little longer if the decoration is more
Chocolate Peanut butter cake
complicated. It's really a thing of beauty to step back and realize how far you've come. Even in the two years that I've been working I realize that I have so much more to learn. Sometimes I think about going to visit my chef to tell him "Hey remember how I couldn't build one cake in less than 30 minutes? Well now I can do 10 in one hour!" I think he'd laugh.

The upside of making desserts for a buffet is that they always require a variety so my boss is pretty open to any flavor my coworkers or I want to make. Black forest? Great. Chocolate peanut butter? Delicious. Pina Colada? Watch it because someone might get drunk off dessert.

I also have the added benefit of working with people that inspire me. There will be nights where my coworker Sophie and I start talking about some other dessert completely and by the end of the night we're trying to figure out how to make it into a cake.

Life is sweet. Busy but sweet.

Monday, August 20, 2012

Wedding Cakes

My last post got me thinking about wedding cakes. Originally wedding cakes made to bring good luck to the happy couple. I suppose not everyone spends hours dreaming up the perfect wedding cake and to some people the cake is an afterthought, but to me there is something about that multi-tiered cake that is a thing of beauty.
Black & white cake

The last week or so before my culinary school finals was dedicated to wedding cakes. Our chef asked us to choose designs that would make us practice our piping. He taught us to properly construct a wedding cake, how to price it out considering the amount of work that goes into one and even gave us some handy advise about not being drunk while making wedding cakes.

My first (well first one in class) wedding cake attempt was a black and white wedding cake. The random filigrees are in vogue right now and gave me plenty of practice when it came to my piping. The roses were made from gum paste or marzipan I honestly couldn't tell you. I remember that as soon as I put the roses on I thought to myself, "Oh yes these are perfect." I look at them now, only a year later, and wonder how in the world I could ever think they were so perfect. They look sort of cute, perhaps if I squint my eyes I can see what I loved about them so long ago. I suppose I could always try to convince myself that they were meant to the look that cartoon-y. After all there is no way I could have possibly thought they looked real. Either way they added a beautiful splash of color to my cake.

The embroidery cake that took over 8 hours to pipe.
My next wedding cake took me hours to complete in regards to the piping. My wrist slightly tightens just thinking about how I spent over eight hours sitting and piping with a size 1 Wilton tip. I think part of me was crazy enough to think that I would whip right through this cake when I saw the design like I whipped through the black & white cake. The latter took me less than a class period to pipe but this embroidery cake I had to work on over the course of two days. Also, let me just say that when you are on your fourth hour of piping you begin to feel every shake of the table that you are working on. Suddenly someone placing their stand mixer on the opposite side of the table feels like a damned earth quake and you fear you will ruin hours of work. I am truly glad that this design was on a Styrofoam cake because I have been able to save it. The same could not be said for my favorite wedding cake.

Seriously my pride and joy
The Pac Man cake was my absolute favorite. I know that it is not as technically complex as the other two but it was something I wanted to do the moment I learned we would be decorating wedding cakes. I wanted a "nerd" wedding cake. Something sweet, appropriate for the occasion, but something that could still give a nod to the fact that popular culture is influencing our special days now. Nerds get married too. Creating black fondant is an all around pain in the neck. Do not think that you can just put some black food coloring into fondant. You will get grey and it will more than likely be an ugly shade of grey. I was lucky enough that a classmate of mine had done most of the work and had quite a bit of black fondant left over. I did have to add some brown and red to get the purplish tinge out and by the end of the day my hand were covered in colour but it was all worth it.  My chef hated the idea, or rather he thought I was just being silly about the task at hand . Our final day of class it was the first cake he threw into the dumpster. I knew it was nothing personal we needed to clean and get to the graduation ceremony, he probably knew I wouldn't be able to do it myself. Oh but how I loved that cake.

All this talk of weddings makes me think of my own wedding cake. I once heard that it is bad luck to make your own wedding cake, I'm not sure there is much truth to that (especially if you are not superstitious) but part of it might come from just how stressful it is. I could not imagine planning a wedding on top of making the perfect cake.

I really do not even know what my wedding cake will one day look like. It will be chocolate, but not red velvet, that is for sure.

Wednesday, August 15, 2012

Red Velvet Wedding Cakes

There comes a time, maybe in everyone's life I don't know I'm not an expert, when you look at what you do and wonder if it even means anything. I mean there are people out there saving lives, writing books that will change the world, performing music that makes others feel emotions. I make cake. Who is to say that making cake isn't important though? I mean yes I admit that I know that making cake is not nearly as important as other jobs but when I come to that ultimate realization that I only cake I remind myself that cake is present at some of the most important occasions.

I have been most fortunate to do a handful of wedding cakes. They are a bucket of stress but ultimately they are something that I love tackling. I remember the first wedding cake that I put together for someone that wasn't family (someone that wasn't blood at least). It was for a friend's wedding. She had requested  three tiered red velvet cake, fill with chocolate mousse and then covered in a ivory fondant. I remember being so stressed the day of the wedding, I had somehow managed to get myself in such a tizzy that I actually assumed she would hate the cake and it would ruin her day. I guess I had been watching too much Bridezillas. The wedding was lovely; and the cake, from what I was told, was delicious. That was four years ago. Now I have been asked by another friend to be apart of her very special day, and my red velvet cake has been called to the tasting.

Red velvet has been very in style in recent years. I admit that I roll my eyes whenever someone calls it their secret weapon on cupcake wars. It's not a secret. It is another delicious chocolate cake with cream cheese icing. It would seem that a lot of people (presumably that do not bake) do not know that red velvet is actually a chocolate cake that has had red food coloring added.  I do not know of many people that have tried the original red velvet, where the red color has been achieved by adding beet juice; nor do I know of any bakeries that really use that recipe anymore.

I've never used beet juice to create a red velvet but it might be fun to try at some point. I think I must be very fortunate to work with very calm brides who already know what they want (and what they want is red velvet). I created red velvet cupcakes for my latest bride. It is always exciting to know that you are making something for someone that they will cherish. There is nothing like red velvet cake with fluffy cream cheese icing.

Friday, August 3, 2012

Let's Talk About Flan

Smooth, creamy, and covered in its own caramel sauce; what's not to love about flan? Flan is a dessert that for a long period of my life I knew I loved it even if I had never tried it. There is something about custard based desserts that sends my senses to the moon and back. The taste of vanilla, the smell of the caramel (which for someone like me, who does not like caramel very much, is saying something). 

No, not that flan. Silly Final Fantasy you do not fight the flan you eat it.
So what is flan? It is essentially a sweet custard that has been baked in a mold, lined with caramel, until it is set. Since pastry school I have come across three types of recipes for flan. All fairly similar but different enough that if you have difficulty with one you are sure to find another recipe that you prefer.

The first is similar to a creme anglaise, it consists of milk, eggs, yolks, sugar and vanilla. This recipe is a bit more difficult than the following two but that is only because it requires you to boil the milk and then temper it in with the eggs. If you do not constantly whisk while adding the hot milk you are going to get scrambled eggs, and while scrambled eggs may be good for breakfast they have no business being in dessert. When I say constantly whisking, I mean constantly whisking. The first time I made a pastry cream on my own I thought I might be able to pour the liquid in, place the pot down then begin whisking. Nope, in those few seconds I had already prepared scrambled eggs. 

The second is a recipe I learned at work. It is similar to the first in that you need to temper the ingredients. However the difference is that instead of milk you used condensed milk and cream. You boil the cream and add it to the condensed milk and egg yolks.A little bit easier but not as easy as the following recipe.

The recipe I used most recently required absolutely no tempering at all. Before we get into the custard we must first make a caramel. This is also fairly easy once you learn what to look for. 

Ingredients:
  • 1 cup sugar
Method:
  1. In a small pot, over medium high heat, place about a 1/3 of the sugar. once the sides begin to liquify move the pot back and forth to distribute the liquid and add a bit more sugar.
  2. Keep doing this until the sugar has melted. Do not leave it settled for too long or it will burn. Another important note about caramel to remember is that it is always darker in the pan than it actually is so it's okay if it looks a bit darker. 
  3. Pour into ramekin or pan of your choosing.
See? How easy was that? You are on your way to making caramel. Now onto the worlds easiest custard recipe.

Ingredients:
  • 6 Eggs
  • 1/2 cup of sugar
  • 2 tsp of vanilla extract 
  • 14 oz condensed milk
  • 24 oz evaporated milk
Method:
  1. Preheat oven to 350 F.
  2. Whisk the eggs, sugar, and vanilla together until smooth. Whisk immediately after adding sugar or you will burn the yolks.
  3. Add each of the milks and whisk until smooth. 
  4. Pour into caramel lined ramekin or pan.
  5. Drop oven to 325 F and bake in a water bath for 35-45 minutes. When it is finished the flan will still jiggle slightly but it should not look watery. 
  6. Once the flan is ready remove from the oven and allow to cool before placing it in the refrigerator for at least 1 hour. 
  7. When you are ready to serve run a knife around the edge of the pan and flip onto an appropriate plate. 
This was made using the first method.
Then that's it! You have delicious flan! The great thing about flan is that it is so easy and delicious, it's a light flavor that is not too heavy on the stomach.  I tried this recipe last night and it was delectable but unfornately I only took a blurry picture of it, and now it is half devoured so taking a new picture is out. So if you are wondering what flan should look like (I guess you could always google it) here is a picture of the flan from my final exam at pastry school.

I recently had a birthday and my wonderful mother-in-law gave me a Le Creuset tart pan. You've seen this cookware before, chances are you know them because they are heavy and they come in a variety of colors. Le Creuset has been in business for nearly 90 years, so they know what they are doing when it comes to cookware. I am so excited to have my first piece and cannot wait to continue adding to my collection. 

From the moment I unwrapped my present and saw the beautiful purple tart pan there my mind was buzzing of what to bake in it first. Naturally I could make a tart as that was the intended use but instead I decided that this marvelous gift would need to make something extra special. It turned out to be the perfect thing for making a large flan and it came out wonderfully. 

Thursday, July 26, 2012

Where are all the cookbooks?

I recently received  a gift card to Barnes & Noble for my birthday so I set out this morning in the hopes of purchasing a cookbook or two. I've recently been re-inspired at work (which might be another entry at another time) and I wanted to get some fresh ideas. Imagine my surprise as I went through shelves and shelves of cookbooks I could not for the life of me find a dessert cookbook with variety. I don't want to seem over dramatic but I was a bit dumb founded. It seems that, when it comes to desserts, cookbooks fall into one of three categories:

Specialty: Gluten-Free, Sugar-Free, or what you can make with microwave. Not terrible, there is certainly a demand for these types of desserts but for me I want my gluten, I want my sugar and I want to use my oven ( or what have you). I admit I know I probably could have looked through these for ideas but it just wasn't what I was looking for.

Cookies: Cookies, cookies, cookies. If you need to find a cookie recipe I'm sure it will not be difficult. There are books on dietary cookies, cookies that look like things, cookies that can all be made from one recipe and cookies that promise to be better than your mothers (which could never be true in my case). Cookies are, of course, a wonderful comfort food and with all the varieties you are certain to find something you like but as with the specialty books a cookie cookbook was just not what I was in the market for...especially considering I already have two.

Last but certainly not least are the Cupcake books. Oh goodness the cupcakes. I counted not two or three but eight different books dedicated to cupcakes. I'm not even talking about books on cakes that you could possibly turn into cupcakes. I am referring to at least either different books that are dedicated entirely to the art of the miniature cake. I have nothing against cupcakes, I love them in fact. I used to work in a very charming cupcake shop (where the own use to let me have them everyday) but I have to admit a bit of frustration when I cannot find a dessert cook book but I can find eight different cupcake books.

I am certain there has to be a cookbook dedicated to the most important meal of the day out there. For whatever reason it was just not at my particular Barnes & Noble. I just want something that has a range of recipes. Cupcakes and cookies may be permitted but they should play harmoniously with the fruit tarts, bundt cakes and various fruit curds. I suppose that is what the internet was invented for. 

Saturday, June 16, 2012

Keep your station clean or I will kill you

Anyone that knows me knows that I am not the tidiest person. It is true that before culinary school cleaning while baking seemed unimportant, something that could be saved for afterward. It was something that I even admitted during my interview for culinary school, I was embarrassed but the woman conducting the first interview told me not to worry that would be fixed during the program.

She was right, for the first few weeks it seemed my chef was constantly reminding all of us to "CLEAN AS YOU GO". On more than one occasion my chef  would pull a student away from their final (thankfully not me) and tell them to clean. It seemed by the end of the program the problem was, for the most part, fixed. Cleaning as I cooked became second nature.


I will make this easy to remember, "Keep your station clean  or I WILL KILL YOU"

Wednesday, May 30, 2012

Holidays in the pastry world

I was grabbing a cup of coffee before work yesterday and the barista asked me how my three day weekend was. It took me a moment before realizing that Memorial day weekend, for a lot of people, means barbecue and an extra day off from work. I smiled and said fine, I knew he was just being polite and making small talk. Truth is I don't remember the last time I had a three day weekend; not that I really mind, I knew what I was signing up for.

My three day weekend was comprised of people wanting more and there not being enough hours in the day. Really nothing out of the ordinary for a holiday weekend. While I do desserts and pastries for most of the eateries in the casino my main focus is desserts for the buffet. Cakes, pies, individual servings of creme brulee, all of it delicious and all of it in large quantities. Sometimes you feel as though you've just refilled the tower of cookies, you turned around and everything is gone.

This is par for the course with most holidays. Christmas? New Years? Valentines? Don't bother making plans, you're working. The last holiday I had off was Thanksgiving and that was because my regular day off is Thursday. Sometimes I feel utterly helpless, like there's no way I can keep up with demand, but at the end of the day I see customers smiling. Every once in a while a customer will pop their head in my little area and tell me that my desserts were just perfection.

Really that's why we do it isn't it? To make people happy. Well that might not be the entire truth, there is something wonderful about creating sweet things. At the end of a 9 hour shift I might be covered in chocolate, flour and frosting; but it's heaven.

Must begin researching vanilla bean cremeux. Father's day is coming up.

Saturday, May 26, 2012

Cheesecake Pie

I have to say Operation Cheesecake Pie was a success.

As I mentioned in my last post being in the culinary industry  leaves very little time for much else in your life; that being said I, for the most part, have difficulty finding much time to bake on my days off.  This cheesecake pie is delicious and saves quite a bit of time. I purchased one of those premade graham cracker pie crusts from the market, due to the aluminum tin I don't have to worry about getting my spring form pan out or that pesky water bath associated with cheesecake. Another upside to this cheesecake pie is that it only takes 35 minutes to bake! That is nearly half the time of most cheesecake recipes and like 1/4 of the time of my usual recipe. That's less time baking and less time between me and eating the thing. 

This was the first time I ever baked a cheesecake without sour cream and the first time I used evaporated milk in the recipe. The texture is not quite as smooth and rich as my normal cheesecake recipe but it is still delicious. Additionally, since the recipe is so easy I might have experiment with the flavors.

Ingredients:

  • 2 eggs
  • 1/2 cup sugar
  • 1 tablespoon all-purpose flour
  • 1 package (8 ounces) cream cheese, room temperature
  • 2/3 cup evaporated milk
  • 1 tbsp vanilla extract
  • 1 tablespoon lemon juice
  • 1/2 teaspoon grated lemon peel
  • 9-inch graham cracker crust, baked
Method:

  1. Preheat oven to 325 F.
  2. In a mixing bowl, beat eggs until thick and light yellow. Add 1/2 cup of sugar and the flour, beating until blended.Set aside.
  3. In another bowl, beat cream cheese with a small amount of the evaporated milk until smooth.Do not forget to scrape the bottom! Add remaining milk, the lemon juice, and the grated lemon peel; beat until smooth and well blended. Pour egg mixture into the cream cheese mixture; beat just until blended.
  4. Pour mixture into the graham cracker crust. Bake at 325° for 25 to 30 minutes. Cool on a wire rack.

I didn't top this particular experiment with anything but it's such a light and fresh flavor adding fruit would be delightful. Might have to try adding chocolate to this recipe.

Friday, May 25, 2012

The Pixie is still baking and eating

Has it really been over a year since I've posted?


I must say that it has in fact been a very busy year for this pixie. I've been baking up a storm, unfortunately being a professional baker doesn't leave much time writing. Have I mentioned that I'm a professional now? Isn't that a weird thought? Well, not professional in the way that Johnny Iuzzini is a professional but I do get paid to make desserts now.

A year ago I was recently graduated and a new intern for a casino (a somewhat big casino in california). I was so excited when they offered me full time employment in October. There were no openings when I left my internship so I found a job at a wonderful little cupcake shop known as Cupcake Love, the owner is a wonderful woman that is filled with love and creativity.Should you ever find yourself near Solana Beach I highly recommend their Peanut Butter Ecstacy cupcakes. I worked there for a few months but once the casino offered me a full-time position I knew I had to take it. Now I spend my days making creme brulee, cakes, pies, breakfast pastries, and even do molded chocolates.

So I'm still baking, eating and hopefully now I'll be making time to write as well.At this very moment I have a cheesecake pie in the oven, it is the first time I've ever made a cheesecake with evaporated milk instead of sour cream, cannot wait to taste it.

Tuesday, May 10, 2011

Double Chocolate Biscotti

Biscotti, like macarons, are cookies that I went most of my life under the impression that I did not like it. I don’t know if this is because the only biscotti I’ve ever really seen was at a Starbucks or because most recipes I’ve seen have nuts; whatever the reason it is does not matter now.

In pastry school we made biscotti once and I was not completely frustrated with the process so I decided that I would some today so my mother could have some fresh biscotti waiting for her when she got home.

I myself am a chocolate fiend and since coffee and chocolate are a wonderful pair it seemed only natural that chocolate biscotti would be perfection.

Ingredients

  • ½ stick of butter (soft)
  • 2/3 cups of sugar
  • ¼ cup cocoa powder
  • 2 teaspoons baking powder
  • 2 eggs
  • 1 ¾ cup of AP flour
  • ¾ cup of semi sweet chocolate chips

Method
  1. In a mixing bowl cream the butter and the sugar together until light and fluffy.
  2. Meanwhile, sift the cocoa powder and baking powder. Gradually add to the butter and sugar.
  3. Beat in the eggs one at a time allowing to fully incorporate before adding the next.
  4. Fold in flour gradually by hand. The batter will start to come together and form a single mass.
  5. Fold in the chocolate chips.
  6. Wrap the dough in plastic and allow to chill for 15 minutes.
  7. Preheat the oven to 375 F.
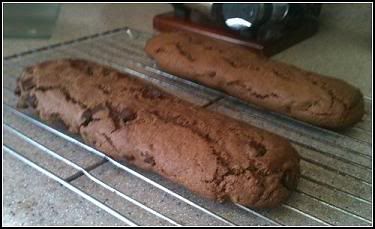
  8. Divide the dough into 2 and roll into 9 inch logs (careful to avoid air pockets). Flatten the top slightly and place on parchment lined cookie sheet.
  9. Bake for 20-25 minutes rotating half way through.
  10. Cool for 5 minutes and then transfer to wire rack to allow to cool for 1 hour.
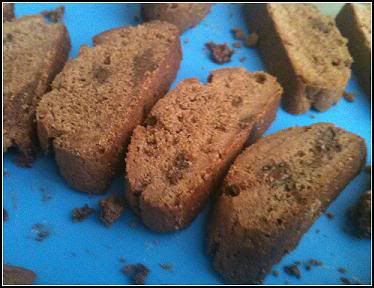
  11.  Cut each loaf into ½ inch slices, and lay flat on a cookie sheet with new parchment. Beware chocolate chips that are on the outside edge though, every time I tried to cut through them my cookie would break and would have to be eaten (oh darn.)
  12. Bake at 325 F for 9 minutes. Flip cookies and bake for another 9 minutes.
  13. Allow to cool and enjoy.

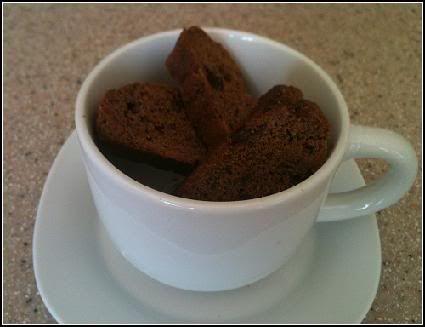
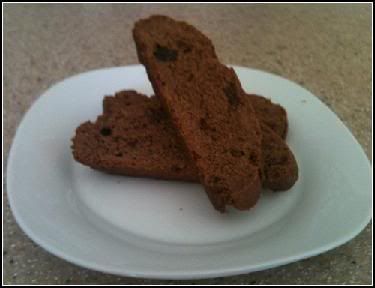
What you are left with it a delicious chocolate cookie that isn’t overpowering or too sweet. They have a great snap and are perfect for dunking.  The only trouble I seem to have with biscotti is cutting them. It seems hitting a soft and gooey chocolate chip causes the piece to crumble. This recipe yielded roughly 2 ½ dozen cookies so I imagine without the causalities it would have made 3 dozen.

The beautiful thing about them also is that they are very quick to come together; the longest part of this recipe is waiting around for them to cool down just to bake them again. I think with the way I’ve been nibbling at them they might disappear pretty fast too.

Sunday, March 27, 2011

Chocolate, Chocolate, and More Chocolate

We've entered the final section of our pastry program and graduation is right around the corner. I almost can't believe that I'm almost finished with school when a few years ago I thought I might not be able to even attend. I've had tremendous support from my family and friends (although who wouldn't support the idea of more cake in the world?) and I feel like it's all a dream.

The final section of our program is chocolate. Our chef warned us that chocolate would be frustrating, and it is to a certain extent. For the most part I remind myself that with the other sections I had had some experience but chocolate is a completely new experience.

One of my favorite chocolates that we've made is called Palet d'or it's a dark chocolate ganache dipped in more tempered dark chocolate and then brushed with edible chocolate.

Oh tempered chocolate. I have a new found appreciation for chocolate and the people that make it now that I know just how finicky it can be. Off by 2 degrees and that's it you have to start all over. Furthermore it seems the darker the chocolate the harder it is to work with which is a shame because I love dark chocolate.

I don't know if I'll make chocolate in the future, chef says that it's a specialization that he doesn't see too much, but I'm enjoying (for the most part) the experience of creating these tiny things of beauty.

Sunday, January 23, 2011

Petit Fours

Pastry school is roughly a 40 hour week for me, this leaves very little time for blogging. I had hoped that as I became more comfortable with the schedule this would change but it seems there is always something to do, a fact that doesn't really bother me. I'm in bliss.

Recently we begun our section on petit fours. Petit fours are small cakes and other delectables that can be consumed in one or two bites. Last week after doing a few we were allowed to come up with our own.

The first petit four that my brilliant classmate and I designed was a white chocolate mint mousse on a layer of dark chocolate raspberry ganache and flourless chocolate cake.

The flourless chocolate cake is light, airy and offers a nice contrast to the richly decadent ganache. The mint was light in flavor and didn't overpower the sweetness of the white chocolate mousse. It tasted somewhat like a thin mint with an extra kick of flavor.

The second petit four we concocted was my personal favorite.  We named it a Banana Colada. Since starting the programs I've wanted to use the banana puree we had in the freezer. Seizing the opportunity to use one of my favorite flavors we create a banana mousse on top of a Pineapple Mango Jelly. The bottom layer was a thin layer of banana mousse with chocolate crunch pearls on a layer of coconut dacquoise. Quite delicious and refreshing to eat.

Petit fours really allow the creative juices to flow and due to their small size they are quite difficult to ignore eating. Usually I'm fairly good about not munching on everything we make in class but I find that this section I will eat at least one petit four from each of my classmates.

Saturday, November 20, 2010

Section 2 Done

I've completed my first section in the kitchen and by the lack of updates I'm sure you can tell I was quite busy.

It's amazing how quickly everything moves before you know it you have everything coming out of the oven and it 1pm.

I just finished a three day final where I had to plan and bake a number of items including: Croissants, Baguettes, Foccacia, Ciabatta, Scone, Pound cake, Brioche de Paris, Croix au Sucre and a few others.

As I become more adjusted to my schedule I hope to keep up with this blog.

Every single day I think about pastries. I wake up at 4:50 am by 7 I'm in my apron prepping dough, writing recipes and thinking about my next flavor combination. I'm in utter bliss, and while I find it difficult to stay up pass 9pm most nights I wouldn't trade it for the world.

Very few people get a chance to follow their dreams and every day I get to make sure there are more pastries in the world.


Monday, October 18, 2010

First Day Back in the Kitchen

Today was the first day in the kitchen at school, no baking yet but it was still fairly exciting. It's nice to be around people who want to create things like you do and getting to know that you're around that much chocolate doesn't hurt either.

Section 1 will be breads which means baguettes, croissants, and all sorts of yummy (read: fattening) things.

Tomorrow begins the real work here's hoping I pass inspection

Monday, August 16, 2010

Homemade Tortillas

When I started this blog I assumed it would be filled with only baked good but this evening I reached an important milestone. My mother taught me how to make homemade flour tortillas, like my grandma used to make in Tijuana, it seems very appropriate that I finally learned to make them the way she did as yesterday was the 5th anniversary of her death. My Mexican heritage is very important to me and my mother agreed that it was important to learn how to make tortillas the way she learned. Not with a recipe but by eying measurements, the way the dough feels, the way it smells when it's ready to flip them.

Darling boyfriend is coming over tomorrow for lunch and after 5 1/2 years of dating I'm finally making him homemade tortillas.

Rolling the dough out I hope he loves them as much as I love making them for him. That is the most amazing thing about food, is the love you put in can really affect the taste.

My grandma's kitchen was always filled with delicious food and she was always feeding people, and her family was always happy as long as we were eating.

Friday, July 9, 2010

Lemon Meringue Cupcakes

Family dinner is every Friday, as I think I mentioned in the Baked Shrimp Scampi entry, and dear brother snorlax comes over. With Business School done and over with and me enjoying my summer days I now have a bit of time to do some baking. So for family dinner I made Ina Garten's Lobster Pot Pie (recipe next entry) and for dessert I thought something citrus would be refreshing.

While browsing the internet I stumbled upon another website with just recipes upon recipes for cupcakes, one recipe in particular caught my eye. Lemon Meringue Cupcakes. So fresh, lemony and adorable to boot! If there is one thing that dear brother snorlax loves it's lemon.

Ingredients:

Cupcakes:
  • 1 1/2 cups of cake flour Note: If you do not have cake flour you can mix 1 3/4 cups of AP flour and 1/4 cup of cornstarch to make 2 cups of a AP flour substitute then just use 1 1/2 cups.
  • 1 1/2 tsp of baking powder
  • 1/4 tsp salt
  • 1 stick of butter (room temperature)
  • 1 cup of sugar
  • 2 eggs
  • 1/2 tsp vanilla
  • 1/2 cup of milk
  1. Preheat the oven to 400 degrees F.
  2. Mix Flour, baking powder and salt.
  3. Gradually beat in butter (if it is room temp this will be so much easier), one the butter is well mixed (little clumps will start forming) throughly beat in the sugar.
  4. Beat in Eggs, vanilla and milk and fill into baking cups about 2/3 of the way.
  5. Bake for 20 min. You'll know the cupcakes are done when a tooth pick comes out clean.
Filling:
  • 1 egg + 1 yolk
  • Juice of 1 fresh lemon
  • 1/2 stick of butter
  • 1/2 cup of sugar
I would recommend setting out everything before beginning this process as you want to be beating the mixture constantly so you don't end up with scrambled eggs.
  1. Using a double boiler (that is a bowl set over simmering water) beat the egg and yolk, I used a hand held electric beater.
  2. Beat in the lemon, butter and sugar.
  3. Stir over medium heat until the mixture has a pudding like consistency.
It will look weird at first especially as the butter breaks down but eventually you will end up with something that looks like a lemon pudding. To me this was like making caramel all over again, because you look at the mixture and you tell your self "there is no way that it is going to get thick" and then 5 minutes later it is thick and you wonder how you could have doubted yourself.

Photobucket
Frosting (Meringue)
  • 5 tbsp of water
  • 1/4 tsp cream of tartar
  • 1 1/3 of cup of sugar
  • 2 egg whites
  • 1tbsp of light corn syrup
  • 1 tsp of vanilla
  1. Beat water, cream of tartar, sugar, egg whites, and syrup in a double boiler on low.
  2. When the mixture reaches 140 degrees beat on high for 5 minutes.
  3. Remove from heat , add vanilla and beat for another 3 minutes.

Assembly:

To put the filling in the cupcakes I used a small cookie cutter to hollow out the top of each cupcake:


Spoon a little bit of the lemon filling into each cupcake:
Pop the top back on and cover with meringue!


Blog Template by Delicious Design Studio