Showing posts with label Cake. Show all posts

Monday, May 27, 2013

Tiramisu: Coffee perfection

Oh tiramisu. Where I work we can hardly keep tiramisu inspired desserts in stock. As soon as that first cocoa powder covered dessert is in the display case people are asking, "is that tiramisu?" "Can I have another slice?" "What do you mean you're out of tiramisu?" "When will you have more?"

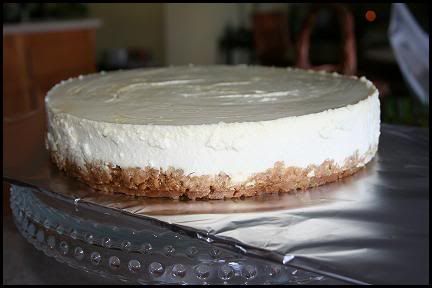
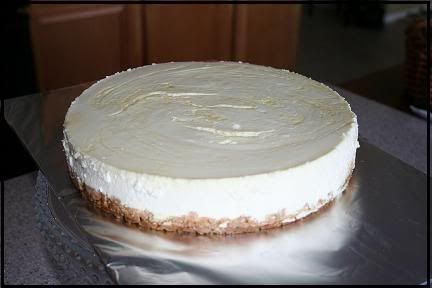
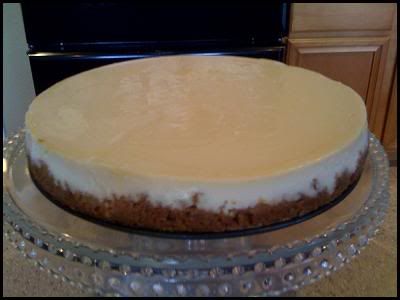
Tiramisu is an Italian dessert that consists of lady fingers, mascarpone cheese and Marsala wine(or maybe a delicious dark rum instead). When reading up on the dessert (everyone does that right?) I learned that tiramisu roughly translates to  pick me up. Tiramisu is a dessert that is telling you to pick it up and shove it in your face. Okay maybe it's more polite than that.  
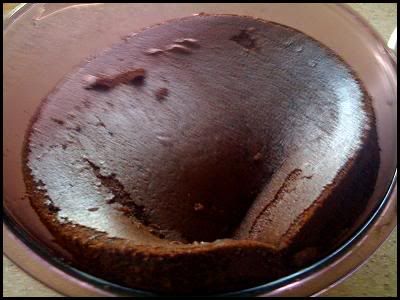
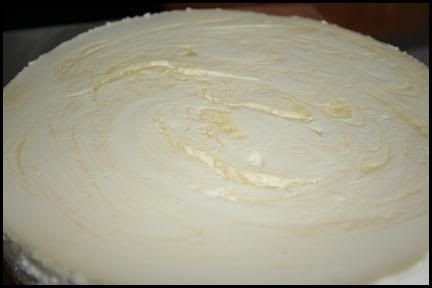
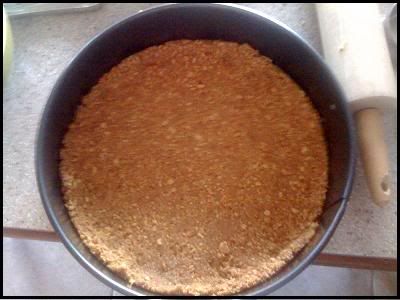
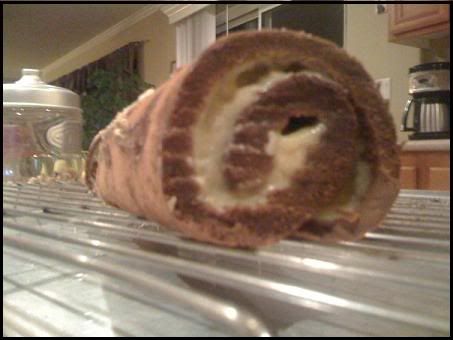
 When I adapt the flavor for the restaurant I don't use lady fingers but I do soak the yellow sponge cake with coffee and alcohol. The frosting has a light coffee flavor and it then sprinkled with cocoa powder. Truthfully the mascarpone, to me anyways, doesn't add much flavor. My coworker tells me that I really don't have to add it as no one would notice with the coffee and wine overpowering the light flavor of the cheese, but I suppose I'm slightly traditional when it comes to flavors like this. 

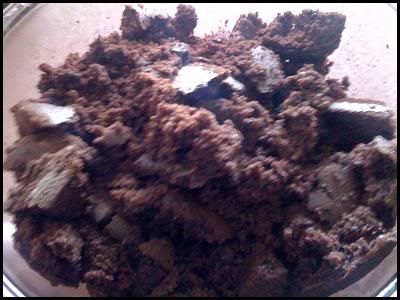
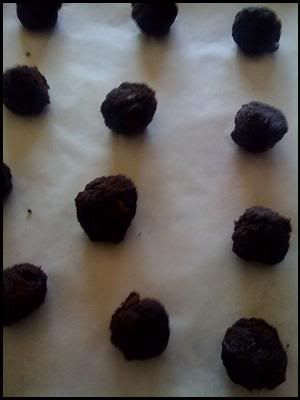
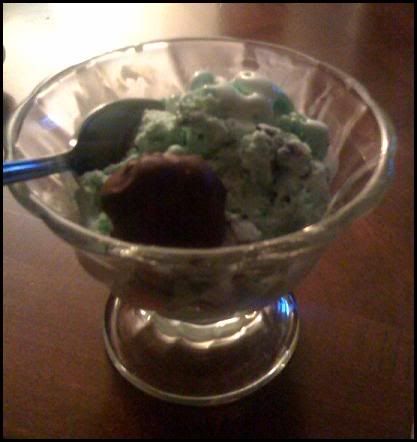
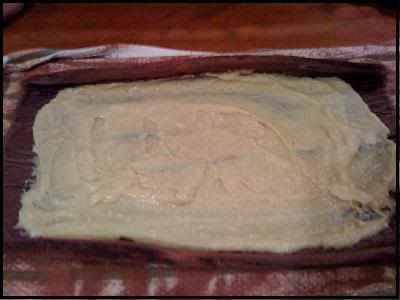
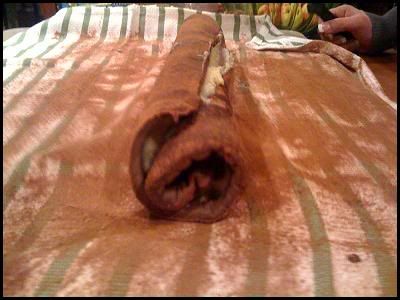
So tiramisu has everything anyone could want. It's a combination of cheese, chocolate, coffee and wine. Perhaps I could adapt it into bombe form, a tiramisu mousse with lady fingers in the center. I might have to try that tomorrow. 

Today is Memorial Day so I'm sure the restaurant will run out of the nine tiramisu cakes I made last night. 

Saturday, April 27, 2013

Cakes, cakes, cakes

Pina Colada Cake
Before I went to pastry school I made cakes at home. I made cakes the way I imagine most do, boxed cake mix, can of frosting or two (one for me and one for the cake). I have really fond memories of helping my mother make cakes for her office parties when I was younger. It was always my job to make sure there was no extra batter left in the bowl before washing it.

By the time I got to pastry school I had this silly notion that I was pretty good at building and decorating cakes. I thought to myself ," This part will be easy." How wrong I was. When you're at home you might not think anything of spending a half hour on a cake. When I was in school my chef informed our class that this would not do. In his way he told us that if we spent more than 30 minutes on a basic cake that any employer would more than likely thank us for our time. He did that frequently. If you can't write in chocolate no one will hire you, if you can't clean as you go no one will hire you, if you can't build a cake in less than 30 minutes no one will hire you. I'm not entirely sure that's really true but I know that it pushed me to work faster, cleaner and all around more inefficiently. 


When I was in school I admit it I couldn't build a cake in less than 30 minutes. In case you're unsure about what I mean by build a cake that includes: trimming, cutting, syruping, filling, frosting, and decorating. In fact it wasn't even until I started at my first job that I really started getting better at it. That might have something to do with amount of cakes that I had to decorate; once you have to make more than 20 cakes in a day you start to develop a rhythm. The older ladies at work (who have been doing this for longer than I've been breathing) showed me their tips and tricks, a fact that I'm extremely grateful for.

My average time is down to roughly 7 minutes per cake, perhaps a little longer if the decoration is more
Chocolate Peanut butter cake
complicated. It's really a thing of beauty to step back and realize how far you've come. Even in the two years that I've been working I realize that I have so much more to learn. Sometimes I think about going to visit my chef to tell him "Hey remember how I couldn't build one cake in less than 30 minutes? Well now I can do 10 in one hour!" I think he'd laugh.

The upside of making desserts for a buffet is that they always require a variety so my boss is pretty open to any flavor my coworkers or I want to make. Black forest? Great. Chocolate peanut butter? Delicious. Pina Colada? Watch it because someone might get drunk off dessert.

I also have the added benefit of working with people that inspire me. There will be nights where my coworker Sophie and I start talking about some other dessert completely and by the end of the night we're trying to figure out how to make it into a cake.

Life is sweet. Busy but sweet.

Saturday, May 22, 2010

Fondant Cakes

Oh Goodness where has the time gone? It has been over a month since I updated and so much has happened since then.

First and foremost, I have been accepted to Culinary School, and I graduated from Business School so I can finally focus on the sweeter and more important things in life.

Secondly, a few very important birthdays went by. My dear brother Snorlax had a birthday and cutie Sami had a birthday. So if nothing else this is a picture post of the cakes I made for their birthdays.


First up, Snorlax cake for my dear brother Snorlax. This was my first time baking in a bowl and I had to keep putting it back in the oven because the middle just would not bake through! I did end up with a nice round tummy for the snorlax though and was pretty happy with the results.


Then for cutie Sami I came up with the idea of trying my hand at a purse cake. More notably, a TokiDoki purse cake. Unfortunately, when I put the cake to let it chill out in the fridge some how the fridge door was left ajar and cake caved in a bit on itself resulting in lumps. So it is a bit of a lumpy purse, she loved it so I decided to chalk this up to experience and not get too upset about it. Especially, considering I made it faster than any other cake and it was also bigger than any other cake I had done before!

There's nothing like cutting out 200 little fondant stars at 1 am :)

Back of the purse:


Front:


Monday, February 22, 2010

Quadruple Chocolate Cake Truffles

Wow, it has been a while. One of the biggest chocolate consumption holidays passed so for Valentine's Day I made the boyfriend something rather special. On Valentine's Day the first year the boyfriend went to college I made him a basket of goodies, including a jar of truffles. The truffles seemed to be a hit with him (and part of his dorm) so I've been looking for ideas to shake things up a big with truffles.

First and foremost bake a cake. Any cake you desire really. For this project I used Double Chocolate cake (chocolate cake with chocolate chips in it; be sure to toss the chips in some flour first so they don't all sink to the bottom). Once your cake is out of the oven and has cooled the fun can begin. Go against all your baking instincts and toss the cake into a bowl.


It feels wrong at first but you must remind yourself that the end result is worth it, so go a head and just tear that cake up.

Next you'll want to add about 3/4ths a can of your favorite frosting. You can of course make your own frosting and should you decide to you'll need about 12 oz. For this project I used Dark Chocolate frosting.


I used a cookie scoop to form the balls but you'll want to use your hands to form them and made them into round balls. Stick them in the fridge while you make the ganache.

I used Ganache for the coating on these truffles because the way the chocolate melts in your mouth is absolute heaven. It gives the truffles a beautiful coat but stays somewhat soft so once you pop those puppies in your mouth the chocolate has already begun to melt and you're getting that intense chocolate flavor.

You'll want to place the truffle in the ganache and roll it around a little bit. Place it on a fork and move the fork back a forth while spooning on more ganache to get a smoother coat.

I can't believe I didn't take a better picture of these before I gave them to the boyfriend. He ended up inhaling them, then on Valentine's day when I made him dinner (what? I can't make sweets all the time can I?) we put some of the last truffles on top of the ice cream we had for dessert.


Luckily for Valentine's Day the boyfriend bought me a mini photoshoot area so hopefully I can start taking better pictures of my stuff. You know, if he doesn't inhale them first.

Friday, January 8, 2010

Lemon Cheesecake


It is the week of cheesecakes for me!

Every Friday night I have family dinner with my mom, her husband John, and my dear brother Snorlax (and our wonderful kitten Louis of course, who supervises my baking). This week I've decided to make Lemon Cheesecake for dear brother Snorlax.

Following the same recipe forNew York Cheesecake that I made for my dad this past week. I added a lemon curd to the top.

For the Lemon Curd:

Ingredients:
  • 1/2 Lemon grated zest
  • 1/3 cup of lemon juice
  • 5 tablespoons of sugar
  • 1 large egg
  • 1/2 teaspoon vanilla extract
  1. Combine lemon zest, lemon juice, and sugar in a sauce and bring to a simmer.
  2. In a separate bowl, beat the egg until light.
  3. Beat some of the hot lemon mixture into the eggs. -It is really important to do this slowly and to constantly beat the egg or else the egg will cook because of the heat and you'll have scrambled eggs. Which is not yummy in cheesecake.
  4. Add the egg mixture back into the saucepan and strain.
  5. Stir in the vanilla and cool to room temperature.

You would add this to the top of the normal cheesecake (therefore making it not a new york style). Adding this to cheesecake I made the mistake of stirring it too much, the egg in the curd caused air bubbles which led to my first cheesecake cracking. Disappointing but still delicious, and in the end when it is for loved ones as long as it's delicious the way it looks doesn't really matter.


It still looks pretty yummy.

Thursday, January 7, 2010

New York Style Cheesecake

Oh Cheesecake. I don't know what it is about this dessert that makes it a complete and total mystery but it's a recipe that usually has me doing more research than any other recipe. Honestly, the variations on this recipe I've seen is mind boggling. Anyways, let's get on with it.

My father's side of the family is from New York and so he is very particular about his cheesecake. As far as I can tell what makes New York Cheesecake New York Cheesecake is the cream cheese to sour cream ratio. Also (according to my father and other new yorkers) it cannot have any sort of topping. Once you put topping on it it is no longer considered New York Cheesecake.

I finally found a recipe that I like and that really seems to come out perfectly everytime I use it. It is from The Cake Bible by Rose Levy Beranbaum, the boyfriend's mother gave it to me and it is by far one of my favorite cook books. What I really love about it is that Rose uses some scientific explanations and I can also read through the book the way you would any other.

For the Graham Cracker crust I used a different recipe as Beranbuam suggests just pressing graham cracker crumbs into the cake afterwards and quite frankly I'm not that talented.

So then for the crust:

Ingredients:
  • 1 1/2 cups of graham cracker crumbs (about 9 cookies in total)
  • 4 tablespoons melted butter
  • 2 tablespoons granulated sugar
  1. Stir together in a small bowl. Really make sure that all of it is incorporated and there are no dry pockets.
  2. Press into the bottom of a springform and up the sides. I have found that it is really easy if you start from the middle and work your way out allowing the crust to push itself up the sides.
You'll get a lovely crust to put off to the side until your batter is ready.


Okay now onto the batter. Cheesecake is another one of those recipes that Os really can't handle but I've been having fun using Alton for this little project.

Ingredients:
  • 16 ounces of cream cheese (2 packages)
  • 1 cup of sugar
  • 3 large eggs
  • 2 tablespoons of freshly squeezed lemon juice
  • 1 1/2 teaspoons vanilla extract
  • 1/4 teaspoon salt
  • 3 cups sour cream
  1. Beat cream cheese and sugar until creamy and smooth (about 3 minutes).
  2. Beat in eggs one at a time, the best results come from waiting until each egg is thoroughly incorporated before adding the next. Also, remember to scrape down the edges.
  3. Add the Lemon juice, vanilla, and salt and beat until incorporated.
  4. Beat in the sour cream just until blended. -as an aside I find that adding the sour cream 1 cup at a time until thoroughly incorporated works well.
  5. Pour batter into your prepared pan. Wrap the pan in 3 layers of tin foil to prevent water from seeping in. Place the pan in a water bath (put about an inch of water in another pan and then place the cheesecake in the center)
  6. Bake for 45 minutes. After 45 minutes turn off the heat and do not open the oven door. Let the cheesecake cool for one hour in the oven then take out and let cool for one hour. Cover with plastic wrap and let refrigerate overnight.
As a side note do not do not do not open the oven door while the cheesecake is baking. Cheesecake is so fussy that opening the over door can lead to cracks.


Ta da! Cheesecake!

Thursday, December 31, 2009

Yule Log with Kahlua Cream and Chocolate Ganache

Every year I can never think of what to get my boyfriend's father for Christmas and so every year I end up making something to delight the sweet tooth. This year my boyfriend mentioned that his father enjoys those hostess snack cakes, Ho Hos, so I decided to try my hand at making a Yule Log. I had seen pictures and while I had never anything rolled before I thought he might enjoy it.

Fortunately, my darling friend Tabitha and her husband Adam bought me The Golden Book of Chocolate as an early Christmas present and I was able to find a recipe.

Ingredients:
  • 1/2 cup all-purpose flour
  • 1/3 cup + 2 tablespoons unsweetened cocoa powder
  • 1/2 teaspoon baking powder
  • 5 large eggs, separated
  • 3/4 cup granulate sugar
  • 2 tablespoons melted butter
  • 1 Teaspoon vanilla extract
  • 1/2 teaspoon
  • Splash of cold coffee (optional)
  1. Preheat the oven to 400 degrees.
  2. Butter and Flour a jelly roll pan (17 x 12 1/2 inch) and line it with parchment paper. Silly me I had always used these pans as cookie sheets--still do--but I had never known that they were actually considered Jelly Roll pans. For a moment there I thought I was going to need to purchase a brand new pan! Not that that would have really upset me ;)
  3. Mix the flour, the baking flour and the 1/3 cup of cocoa powder in a large bowl.
  4. In a separate bowl beat the eggs yolks, 1/4 cup of sugar and the melted butter at a high speed until pale and thick. -As a side note, if you are not confident in your egg separating skills I suggest watching Episode 94 of Three's Company Jack shows the girls how to separate eggs and the lesson actually helped me get more confident in it too.
  5. Add the vanilla extract and if you choose to add a splash of cold coffee you should do it now. The recipe in the cook book did not call for it but I find most of the time I make anything with chocolate I end up adding a splash of coffee. Ina Garten does this often and I have found that it really does bring out the taste of the chocolate instead of over powering it.
  6. Use a rubber spatula to fold in the dry ingredients.
  7. In yet another bowl, beat the egg whites and salt in at a medium speed until frothy. With the mixer at a high speed, gradually add the remaining cup of sugar (1/2 cup) until stiff peaks form. Fold this into the batter.
  8. Spoon this into the prepared pan and bake for 10-12 minutes.
Next is the fun part. When the cake comes out you'll want to flip it over onto a kitchen towel that has been dusted with the remaining amount of cocoa powder (2 tablespoons should be enough but don't be afraid to use more). My mother and I had such an adventure with this because you need to flip the cake onto the towel once it comes out of the oven. After a few moments of us hopelessly trying to figure out how to flip it struck me that the most obvious way is the best way. Finally, I simply yelled out "No fear!" grabbing the edges of the parchment paper I pulled and flipped the cake onto the towel. We had a good laugh because my mother was on the side of the cake and was now covered in cocoa powder.


Using the cloth roll the cake up and let it cool this way.


This will give you time to make the cream.
Ingredients:
  • 5 Large eggs yolks
  • 2/3 cup granulated sugar
  • 2 tablespoons Kahlua (or your favorite coffee liqueur)
  • 2 cups milk
  • 1/4 teaspoon salt
  • 1/2 teaspoon vanilla extract
  1. Beat the yolks, sugar, and liqueur until pale and thick.
  2. Bring the milk to a boil.
  3. Place the flour and salt in a bowl.
  4. Pour a bit of the boiling milk and stir until smooth. Once smooth pour the remaining milk.
  5. Pour the milk, flour and salt mixture into the yolks and sugar. -You must must must do this part slowly and be sure to stir while doing this. You want to bring the temperature of the eggs up slowly or else you'll end up with scrambled eggs and those do not go well with chocolate cake.
  6. Simmer over low heat, stirring constantly until it gets thick.
  7. Let it cool.
Once your cream is cool you'll want to unroll your cake and spread the cream onto the cake.

Then reroll the cake!

I sliced off the edges for neatness sake:

Then to give the cake that snack cake look I decided to cover it in chocolate Ganache.

Ingredients:
  • 12 oz semi-sweet chocolate, grated chopped or morsels will work.
  • 1 1/4 cups heavy cream
Simply bring the cream to a boil and pour the hot cream into the chocolate and stir until the chocolate has completely melted and the mixture is shiney. Let cool and then pour over the cake.

Wednesday, December 30, 2009

Twilight Cake

So a friend needed to make a Twilight cake. I don't like Twilight but I thought that making a cake for something that I don't like or particularly know would be a nice challenge. It was also the first time I did food coloring paint on fondant which was fun and smell delicious.


Photobucket

First we covered it in Fondant and I realized that when I open a bakery I need to hire Adam Wiebe because he uses his strong arms to roll out the fondant quickly for me--especially when my wrists are sore from crocheting (what? I'm an old woman.)

Photobucket

Here's the cool part. I had never painted on fondant or made my own edible paints before. I used Almond extract instead of lemon and the scent was divine, but as with Vanilla extract the scent is deceiving, at least when it was by itself when it was on the cake it was fine.

Photobucket

Since it was a round cake we decided that painting a straight chess board would look a little weird so we chose to fade the brush strokes.

Photobucket

The finish thing, I love the little apple. Originally it was just red fondant but a black spoltch of food coloring on it so I decided to take red food coloring to it and really ended up loving the result.

Photobucket

Tabitha showing off her...um twilight shirt with our twilight cake.
 
Blog Template by Delicious Design Studio