Sunday, January 31, 2010

Green Tea Cookies

Ok so pixie is back and baking! Jeez, business school starts up and suddenly I cannot find a minute to bake.

So one flavor I have always loved is green tea. Green tea ice cream is my absolute favorite and then a friend of mine mentioned green tea cookies! I had thought about green tea cookies before but had never really found a recipe. Well thanks to Appetite for China. I found one!

Ingredients:
  • 1 cup all purpose flour
  • 1/4 cup sugar
  • 1/4 cup confectioners' sugar
  • 1 tablespoon green tea matcha powder
  • 1/4 teaspoon salt
  • 1/2 teaspoon vanilla
  • 1 teaspoon water
  • 1/2 cup unsalted butter, chopped into small cubes
  1. Mix the flour, sugars, green tea powder, and salt in a large bowl.
  2. Add the vanilla, water and butter.
  3. Mix them together until a dough forms. The dough will look a bit weird:
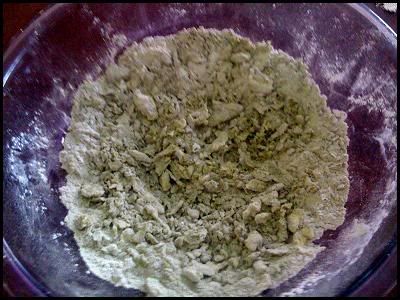
  4. Just get in there with your hands and keep mixing until the dough fully forms!
  5. Roll the dough into a log onto a piece of wax or parchment paper. Wrap the paper around and shape the log until it is smooth.
  6. Chill for 30 minutes.
  7. After chilling slice the log in to cookie slices and bake for 10-12 minutes at 375 degrees.
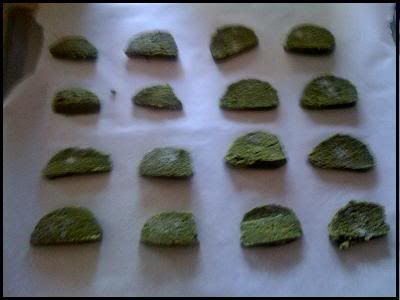
  8. Let cool for 5 minutes and enjoy!

The taste is definitely a green tea flavor, this will surely delight those who truely love green tea. However the taste can also be...interesting. Might have to tweak the recipe, perhaps add honey to make them sweeter, to make it delicious for non-green tea fiends.
Saturday, January 16, 2010

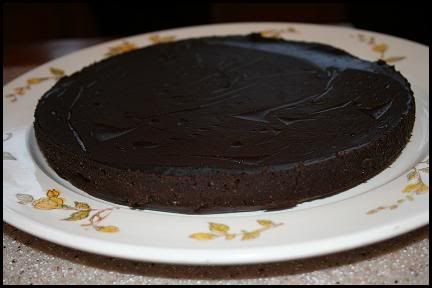
Oblivion Chocolate Truffle Torte


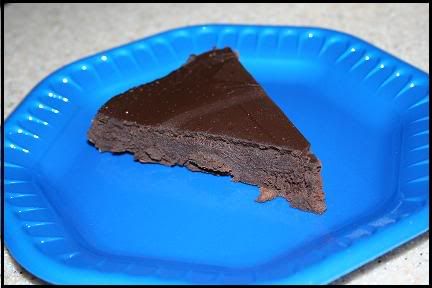
Oh Chocolate. Oblivion Chocolate Truffle Torte is the wrong name for this torte, it should probably be called punch in the mouth chocolate torte. This torte is for the chocolate lover, you really taste chocolate once it begins to melt in your mouth, with this torte you skip the step of letting it melt and are hit with intense flavor.

Ingredients:
  • 16 ounces of semi-sweet chocolate (bitter sweet will work too if you want dark chocolate)
  • 1 cup (2 sticks) unsalted butter
  • 6 large eggs

  1. In a double boiler (glass bowl set over boiling water) combine the chocolate and butter. It's really important that the bottom of the bowl doesn't touch the water or else the chocolate is more likely to burn. Burnt chocolate makes for a sad day.
  2. While the chocolate is melting in another double boiled (in this case the water should just be simmer) beat the eggs until warm to the touch. It is important that you are constantly stirring or else the eggs will curdle.
  3. Remove from the heat and beat until triple in volume and soft peaks form when the beater is raised (about 5 minutes)
  4. Using the a large wire whisk fold 1/3 of the eggs into the chocolate (always eggs into chocolate never other way around) until there are no streaks. Continue with the rest until there are no streaks.
  5. Pour into a prepared spring form pan and place in a water bath.
  6. Bake at 425 degrees for five minutes, then loosely cover with a buttered foil and bake for 10 minutes.
  7. Let cool for 45 minutes on a rack and then cover with plastic and refrigerate until very firm for about 3 hours.
Before serving allow to come back to room temperature and enjoy, if served chilled the texture is like a dense fudge so either way it's delicious.


Sunday, January 10, 2010

Class Sit In

Last Tuesday, I had the great pleasure of doing a class "sit in" at the culinary institute. I wasn't really sure what to expect from a class sit in, especially given what I had already heard about the classes I wasn't sure how a class sit in would work.

I quickly learned that "sit in" was the wrong term. When I arrived the admissions counselor threw a lab coat on me and quickly shuffled me off to the where the pastry students were. There they were working on Petit Fours.

I was really shy at first I wasn't really sure what I was meant to ask. After a moment of standing there and watching all of them work a very nice young woman had placed her chocolate decorations in the freezer and took a moment to discuss what she thought about the program. Overall she seemed to enjoy it, she told me the program is really fast paced but at the same time you use the same techniques over and over so you get used to them.

All the students were really nice and even offered me a mini Opera cake and a mini Lemon tart. I must admit I had some difficulty understanding the Chef as he has a very thick french accent, but the students assured me that if accepted I would get used it.

I spoke with one student who actually just left her job in a marketing industry to come. She said it was competitive and interesting but it wasn't satisfying. I told her about how I was finishing business school with a marketing degree and she just smiled. I told her about how long I've known that I wanted to be a baker and she wished me luck on my application.

One guy told me about how he was on the team for the school and how they've begun team practices. I really like the idea of trying out for the team if I get into the school.

At the end of my sit in everyone pulled out cameras to take pictures of their work which put a smile on my face. It's good to know that if I get in I'll be able to take pictures of all my work.

Friday, January 8, 2010

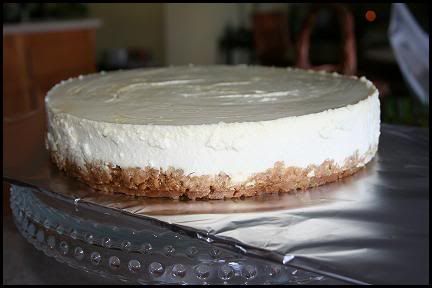
Lemon Cheesecake


It is the week of cheesecakes for me!

Every Friday night I have family dinner with my mom, her husband John, and my dear brother Snorlax (and our wonderful kitten Louis of course, who supervises my baking). This week I've decided to make Lemon Cheesecake for dear brother Snorlax.

Following the same recipe forNew York Cheesecake that I made for my dad this past week. I added a lemon curd to the top.

For the Lemon Curd:

Ingredients:
  • 1/2 Lemon grated zest
  • 1/3 cup of lemon juice
  • 5 tablespoons of sugar
  • 1 large egg
  • 1/2 teaspoon vanilla extract
  1. Combine lemon zest, lemon juice, and sugar in a sauce and bring to a simmer.
  2. In a separate bowl, beat the egg until light.
  3. Beat some of the hot lemon mixture into the eggs. -It is really important to do this slowly and to constantly beat the egg or else the egg will cook because of the heat and you'll have scrambled eggs. Which is not yummy in cheesecake.
  4. Add the egg mixture back into the saucepan and strain.
  5. Stir in the vanilla and cool to room temperature.

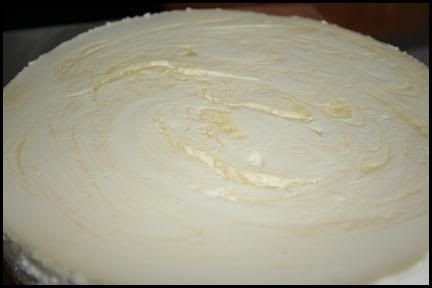
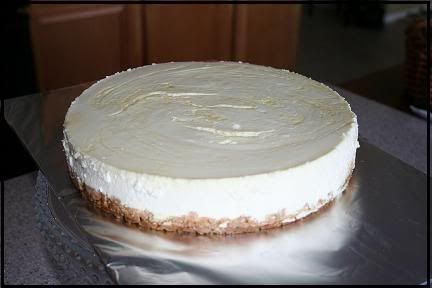
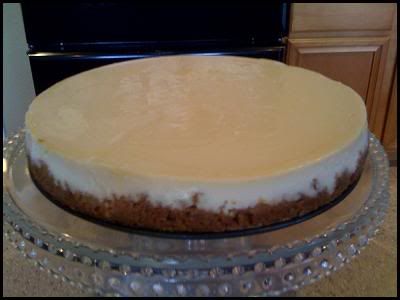
You would add this to the top of the normal cheesecake (therefore making it not a new york style). Adding this to cheesecake I made the mistake of stirring it too much, the egg in the curd caused air bubbles which led to my first cheesecake cracking. Disappointing but still delicious, and in the end when it is for loved ones as long as it's delicious the way it looks doesn't really matter.


It still looks pretty yummy.

Thursday, January 7, 2010

New York Style Cheesecake

Oh Cheesecake. I don't know what it is about this dessert that makes it a complete and total mystery but it's a recipe that usually has me doing more research than any other recipe. Honestly, the variations on this recipe I've seen is mind boggling. Anyways, let's get on with it.

My father's side of the family is from New York and so he is very particular about his cheesecake. As far as I can tell what makes New York Cheesecake New York Cheesecake is the cream cheese to sour cream ratio. Also (according to my father and other new yorkers) it cannot have any sort of topping. Once you put topping on it it is no longer considered New York Cheesecake.

I finally found a recipe that I like and that really seems to come out perfectly everytime I use it. It is from The Cake Bible by Rose Levy Beranbaum, the boyfriend's mother gave it to me and it is by far one of my favorite cook books. What I really love about it is that Rose uses some scientific explanations and I can also read through the book the way you would any other.

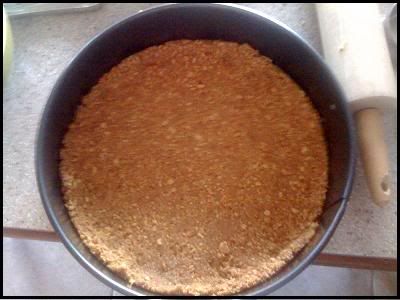
For the Graham Cracker crust I used a different recipe as Beranbuam suggests just pressing graham cracker crumbs into the cake afterwards and quite frankly I'm not that talented.

So then for the crust:

Ingredients:
  • 1 1/2 cups of graham cracker crumbs (about 9 cookies in total)
  • 4 tablespoons melted butter
  • 2 tablespoons granulated sugar
  1. Stir together in a small bowl. Really make sure that all of it is incorporated and there are no dry pockets.
  2. Press into the bottom of a springform and up the sides. I have found that it is really easy if you start from the middle and work your way out allowing the crust to push itself up the sides.
You'll get a lovely crust to put off to the side until your batter is ready.


Okay now onto the batter. Cheesecake is another one of those recipes that Os really can't handle but I've been having fun using Alton for this little project.

Ingredients:
  • 16 ounces of cream cheese (2 packages)
  • 1 cup of sugar
  • 3 large eggs
  • 2 tablespoons of freshly squeezed lemon juice
  • 1 1/2 teaspoons vanilla extract
  • 1/4 teaspoon salt
  • 3 cups sour cream
  1. Beat cream cheese and sugar until creamy and smooth (about 3 minutes).
  2. Beat in eggs one at a time, the best results come from waiting until each egg is thoroughly incorporated before adding the next. Also, remember to scrape down the edges.
  3. Add the Lemon juice, vanilla, and salt and beat until incorporated.
  4. Beat in the sour cream just until blended. -as an aside I find that adding the sour cream 1 cup at a time until thoroughly incorporated works well.
  5. Pour batter into your prepared pan. Wrap the pan in 3 layers of tin foil to prevent water from seeping in. Place the pan in a water bath (put about an inch of water in another pan and then place the cheesecake in the center)
  6. Bake for 45 minutes. After 45 minutes turn off the heat and do not open the oven door. Let the cheesecake cool for one hour in the oven then take out and let cool for one hour. Cover with plastic wrap and let refrigerate overnight.
As a side note do not do not do not open the oven door while the cheesecake is baking. Cheesecake is so fussy that opening the over door can lead to cracks.


Ta da! Cheesecake!

Sunday, January 3, 2010

The Road to Culinary School

2010 promises to be a very big year for me. One of the reasons I started this blog was not only to have a creative outlet for my baked goods and cooking experiments but also to have a place to detail the process of applying to culinary school--and hopefully to detail my experience there if I get accepted.

In May of 2010 I'll be graduating California State University-San Marcos with a degree in Business (Marketing) and a minor in Women Studies. If all goes as planned I hope to attend culinary school in San Diego in September.

The School:
The San Diego Culinary Institute--if you're in the Southern California area you might know this particular school by the cheesy commercials and I must admit the first time I went for an interview I was a bit nervous.

While waiting for my interview my mother suggested that I look up reviews from past students again to reassure myself. She was right, it did reassure me and I went into the interview feeling a lot better. I met with a very nice woman named Lorie and she went over the general overview of the school with me and my mother. We briefly discussed financial information and then Lorie gave my mother and me a tour.

The "classrooms" were amazing, and watching the students listen to their chef and begin work on their cuisine was nothing short of exciting. The pastry students were working on Opera Cake, which looked delicious. The classrooms are small, each program only accepts 16 students, so if accepted I'd be fairly close to the Chef at all times and when I met him during the tour he told me that there would be a lot of hands on experience.

The Program:
Diplome Professionnel du Boulangerie et de la Patisserie--The program is a total of 1060 hours over a period of 6 months. 5 day a week, 8 hours a day. Best part of all is that I get to take everything I make home, which is kinda crazy. I hope all my friends and family are prepared to gain at least 15 pounds. There is an entire week devoted just to chocolate cakes! Quick breads, yeast breads, breakfast pastries, cakes, pies, tarts, cookies, individual pastries, petite fours, dessert sauces, dessert containers, chocolate and sugar work! It's enough to make a girl's head spin just from the thought of the sugar alone!

I'm going to the school on Tuesday to sit in on a class and really begin the application the process.

It's weird, a few years ago this whole thing just seemed like a dream and now that I'm starting the process it's all a little surreal.

Saturday, January 2, 2010

Chocolate Dipped Peanut Butter Cookies

I am thoroughly convinced that there is no better taste combination than chocolate and peanut butter. So when my friend sami's grandmother asked me to make her 5 dozen cookies for her cookie exchange--and mentioned that chocolate chip was not an option but the cookies should be rather simple--I knew chocolate dipped peanut butter cookies were the answer.

Simple, delicious, and who doesn't love melting chocolate? And peanut butter cookies have to be the easiest cookies in the world. Unfortunately they are terribly difficult for Os--thick things like peanut butter...or butter for that matter make him turn into a grump old man.

I use a simple peanut butter cookie recipe:

Ingredients:
  • 1 cup peanut butter
  • 1 cup of sugar
  • 1 large egg
  • 12 oz for semisweet chocolate morsels
  1. Preheat the oven to 350 degrees.
  2. Beat the Egg, peanut butter, and sugar until a dough forms.
  3. Form the dough into small balls and place on cookie sheet.
  4. Bake for 10 minutes.
  5. You can easily create a double boiler by simmering water in a pot and placing a glass bowl on top of it. Place your chocolate chips in the glass bowl and stir them around with a rubber spatula. Once the chocolate is halfway melted you can remove it from the heat and just continue to stir so the chocolate won't burn.
Once the cookies have cooled just dip them in the chocolate and let them sit in the fridge until you're ready to eat them.


The best thing about these cookies is how the chocolate melts in your mouth and then the soft center of the peanut butter cookie is just perfection.

That's why I love Sami. She is one of those people that no matter what sweet I make she'll eat it even if it's ridiculously simple like peanut butter cookies; however perhaps when it comes to cookies simple is always best.

I honestly cannot for the life of me remember why I used to think peanut butter cookies were so difficult. It might be because Os doesn't do well with them. Sometimes I'd rather use the Betty Crocker easy cookie mixes for peanut butter cookies, which I'm sure is some sort of baking sin, but it's a lot better than dealing with Os when he's being fussy.

Friday, January 1, 2010

Lemon Bars

I have to admit that 99.99% of my baking is usually for someone else. One of my favorite people to bake for is my brother Snorlax. My brother used to be a sane Chocoholic like myself but in recent years it seems that his love for chocolate has waned. As it turns out his sweet tooth is delighted by tart! Lemon, lemon, lemon!

So after raiding my mother's cookbook shelf I came upon Luscious Lemon Desserts, a collection of tartly delicious lemon recipes.

Ingredients:
  • 1 Cup plus 2 tablespoons All-purpose flour
  • 1 3/4 cups confectioners' sugar
  • 2 tablespoons finely grated lemon zest
  • Pinch of salt
  • 1/2 cup chilled unsalted butter
  • 1/2 teaspoon baking powder
  • 3 large eggs
  • 1/4 cup plus 3 tablespoons fresh lemon juice
  1. Preheat oven to 350 degrees. Butter an 8x8 baking pan
  2. Whisk 1 cup of the flour, 1/4 cup of the confectioners' sugar, the zest, and the salt.
  3. Cut the the butter into tiny cubes. The cookbook calls for a pastry blender or 2 knives used in scissors-fashion, but I cut the butter into tiny tiny pieces and it made no difference.
  4. Mix with your best tool-a pair of clean hands!-until the mixture resembles coarse crumbs and then keep kneading the mixture until the dough comes together.
  5. Transfer the dough to the baking pan and press it evenly into the bottom. Bake for 25 minutes and allow it to cool while you make the filling
  6. Whisk together the remaining confectioners' sugar (1 1/2 cups), the remaining flour (2 tablespoons) and the baking powder in a small bowl.
  7. Beat the eggs on high for about 2 minutes. Reduce the speed to low, add the sugar mixture, and beat just until blended, scraping down the side bowl.
  8. Add the lemon juice and keep blending!
  9. Pour the lemon mixture over the crust and bake for 18-20 minutes.
  10. Let cool in the pan.
Cut and enjoy after they've cooled. Just before serving sprinkle with more confectioners' sugar.

A sure delight for anyone that likes lemon. I had a bite and could not believe the tartness. I feared that they might have been too tart but my brother loved them. I think next time I want to use the same recipe but instead of using a square baking pan I want to use tartlet pans. How amazing would mini lemon tarts be?
 
Blog Template by Delicious Design Studio